

Table of Contents
- Why Use Ironmartonline Equipment Broker for Your Excavator Purchase
- Best Inspection Checklist for Used Excavators: A Complete Framework
- Walk-Around Inspection: Structural Integrity and Visible Damage
- Undercarriage Wear Assessment: Tracks, Rollers, and Sprockets
- Engine and Fluid Level Checks: Oil, Coolant, and Fuel
- Excavator Hydraulic System Inspection: Pressure, Leaks, and Cylinders
- Cab Interior and Control Functionality
- Field Testing and Operation: Cycle Times and Performance
- Service Records and Documentation: The Used Excavator Buying Guide
- Common Red Flags and Fraud Detection
Last Updated: August 29, 2026
Why Use Ironmartonline Equipment Broker for Your Excavator Purchase
When you're buying a used excavator, the stakes are high. A mid-size contractor comparing options for a $250,000 excavator faced a critical choice: pay cash, take out a bank loan, use a manufacturer lease, or find a used alternative. The used option delivered $150,000 in savings, though it came with higher maintenance risk and a shorter warranty. That's the kind of decision that separates smart buyers from those who overpay.
But here's the real question: why does it matter where you source your equipment? Because the marketplace you choose determines your access to inventory, your ability to verify condition, and ultimately, whether you get fair pricing. A Heavy Equipment Broker like Ironmartonline connects buyers and sellers of used machinery through nine specialized web-based selling platforms, reaching millions of potential buyers globally and locally. That reach matters when you're trying to find the right machine at the right price. Why use Ironmartonline Equipment Broker specifically? Because broader marketplace access means more competitive pricing, more transparent inventory, and better negotiating power when you're ready to buy or sell.
The difference between a good excavator deal and a money pit comes down to one thing: inspection. You need a systematic way to evaluate structural integrity, hydraulic function, undercarriage wear, and service history before you commit your capital. This guide walks you through the best inspection checklist for used excavators, a comprehensive framework that separates equipment ready for years of productive work from machines that will drain your budget in repairs.
We'll cover the walk-around inspection, undercarriage assessment, engine and fluid checks, hydraulic system evaluation, cab functionality, field testing, and documentation review. By the end, you'll have a repeatable process that catches red flags before they become expensive mistakes.
Best Inspection Checklist for Used Excavators: A Complete Framework
A structured inspection checklist for used excavators isn't optional, it's the foundation of a sound purchasing decision. The best inspection checklist for used excavators combines visual assessment, functional testing, and documentation review into a single systematic process that protects your investment.
Think of this framework as your defense against hidden problems. BuildRight Construction owns a fleet of 20 pieces of heavy equipment worth $5 million in initial investment. Their annual maintenance and repair costs run $300,000, with insurance at $100,000 and depreciation at $2 million over five years. A single machine sitting idle for 20 hours per week costs $50 per hour to own, that's $1,000 per month, or $12,000 per year in hidden costs. Catching problems early prevents that kind of waste.
The best inspection checklist for used excavators covers eight critical areas. Each section builds on the previous one, creating a comprehensive picture of machine condition before you make an offer. According to Simply Fleet's heavy equipment inspection guidance, a thorough checklist should include checking oil, coolant, and fuel levels; ensuring all gauges and meters function; inspecting tires or tracks for wear and proper inflation; checking battery charge and connections; verifying all lights are operational; inspecting hydraulics for leaks and proper function; testing brakes; and ensuring all safety equipment is in place and functional.
The process takes time, but it's time well spent. A systematic approach eliminates guesswork and gives you confidence in your purchasing decision.
Walk-Around Inspection: Structural Integrity and Visible Damage
Start your inspection before you touch anything. Walk around the entire machine, looking for obvious damage, rust, dents, and paint condition. This first pass tells you whether the equipment has been maintained or neglected.
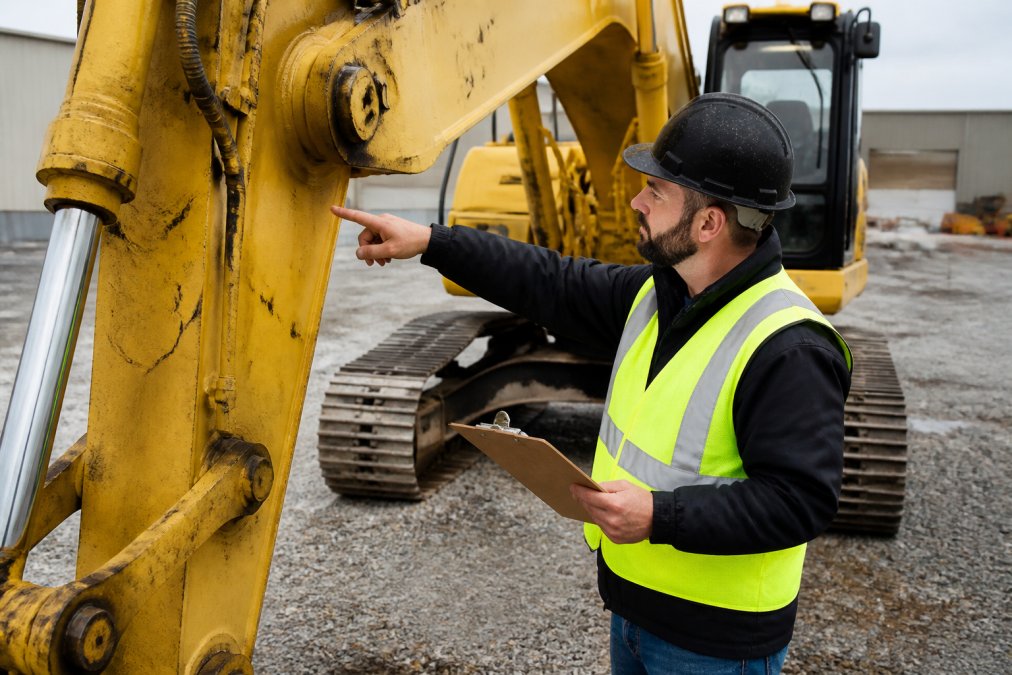
Look for rust patterns that indicate water pooling or exposure. Heavy rust in the cab or engine compartment suggests the machine has been stored outdoors without protection. Surface rust is normal; deep pitting or structural rust is a red flag. Check all access panels, doors, and latches for proper fit and function. Misaligned panels suggest the machine has been dropped or struck.
Boom, Stick, and Bucket Assessment
The boom and stick are the excavator's working arms. Inspect them for bends, cracks, or obvious deformation. A bent boom doesn't just affect performance, it indicates the machine has been overloaded or abused. Run your hand along the boom surface to feel for ripples or distortion that might not be visible from a distance.
Check the bucket for tooth wear and damage. Worn bucket teeth are normal wear items, but missing teeth or cracked teeth suggest aggressive use. Inspect the quick-coupler pins and locking mechanisms for excessive play or wear. These components are critical for safe attachment changes.
Weld Seams and Stress Fractures
This is where most buyers miss critical problems. According to Mekantra Tech's excavator inspection field guide, inspect weld seams along the boom and stick for hairline tension cracks, stress fractures, or re-welded patch plates. A machine that's been re-welded has been damaged and repaired, that's not necessarily disqualifying, but it tells you the machine experienced significant stress.
Look for paint cracks or discoloration around welds. Fresh welds will have different paint or visible repair work. Run your eyes along the length of the boom and stick, looking for any deviation from the original shape. Stress fractures often start at weld points where metal properties change.
Undercarriage Wear Assessment: Tracks, Rollers, and Sprockets
The undercarriage takes constant punishment. It's in direct contact with the ground, absorbing impacts and stress. Replacement costs are high, so undercarriage condition directly impacts your total cost of ownership.
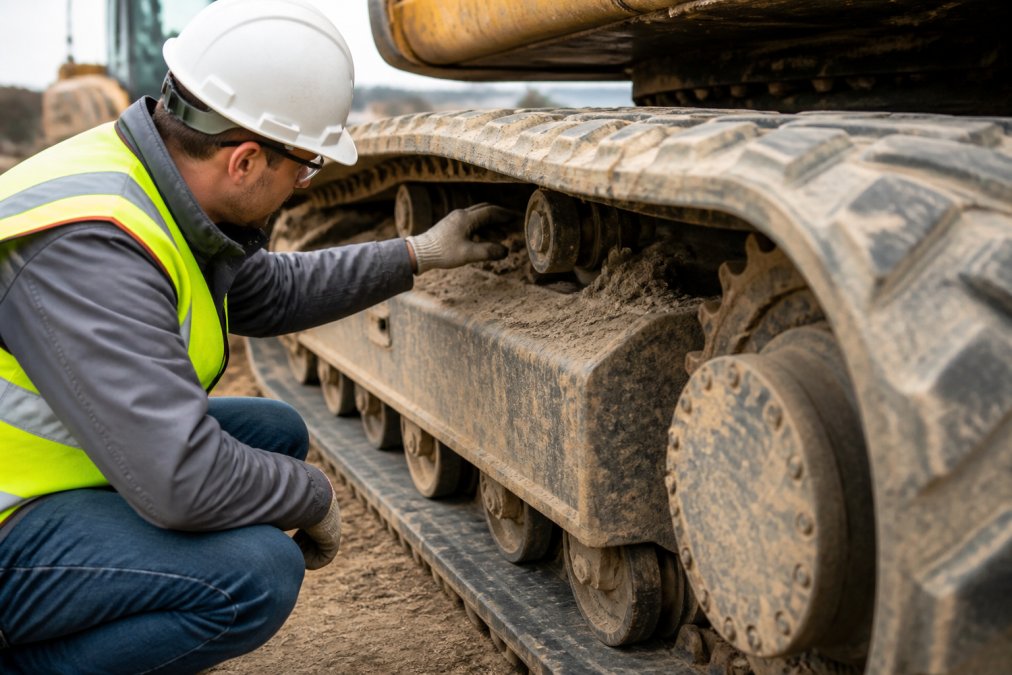
Inspect the rubber tracks for consistent wear across the width. Uneven wear indicates the machine hasn't been operated level or the tracks have been misaligned. Look for chunks missing from the track, tears, or separation of the rubber from the metal core. Check track tension by pressing on the track with your hand, it should have slight give, not be rock-solid or sagging.
Examine the rollers, idlers, and sprockets closely. These rolling components wear progressively. Smooth, shiny wear is normal; pitting, scoring, or visible metal loss indicates advanced wear. Spin each roller by hand if possible, it should rotate freely without grinding or resistance. Listen for any noise that suggests bearing wear.
According to Gregory Poole Equipment Company's used excavator buying guide, consistent wear across tracks indicates balanced operation, while assessing rolling components like rollers, idlers, and sprockets is critical due to high replacement costs. The center swivel ring and house gear also require inspection for gear tooth wear and grease contamination.
Engine and Fluid Level Checks: Oil, Coolant, and Fuel
Open the engine compartment and check all fluid levels. Low oil, coolant, or fuel tells you the machine hasn't been properly maintained. Check the oil dipstick for color and consistency. Dark, thin oil suggests the machine is overdue for an oil change. Milky or foamy oil indicates water contamination, a serious problem.
Look for fluid leaks around the engine block, valve covers, and oil pan. Small seeps are common; active drips mean seals are failing. Check the coolant level and color. Green or orange coolant is normal; rusty or cloudy coolant indicates corrosion inside the cooling system. Smell the coolant, sweet smell indicates a leak into the combustion chamber.
Check for blow-by by removing the dipstick and holding it near the oil filler opening. Excessive gas pressure pushing out indicates ring wear or piston damage. Listen to the engine at idle for unusual knocking, ticking, or grinding sounds. These indicate internal wear.
Excavator Hydraulic System Inspection: Pressure, Leaks, and Cylinders
Hydraulics are the nervous system of an excavator. Any failure here stops work immediately and can cost $15,000 to $40,000 in pump or motor replacement. A systematic hydraulic inspection separates machines ready for years of service from those heading toward major repair bills.
Visual Inspection and Leak Detection
Inspect hydraulic hoses for cracks, leaks, or damage. Look for fluid pooling under the machine, which indicates active leaks. Check hose routing, sharp bends or contact with hot surfaces indicate poor maintenance and accelerated hose failure. Examine all connection points, fittings, and quick couplers for seeping fluid. A small weep around a fitting is normal; active dripping requires seal replacement before operation.
Inspect all hydraulic cylinders for external leaks. Look at the cylinder rod surface for scoring or pitting, which allows fluid to bypass seals and causes loss of control. Check cylinder mounting pins and bushings for play or wear by grasping the rod and attempting to move it side-to-side. Excessive movement indicates worn bushings that will require replacement.
Examine the hydraulic fluid color and clarity. Bright red or amber fluid is normal; dark brown or black indicates the fluid has been overheated or contaminated. Fluid that smells burnt suggests the machine has been operated beyond safe temperature limits. Milky or cloudy fluid indicates water contamination, a serious problem that requires complete system flushing.
Pressure Testing and Diagnostic Tools
For modern excavators, use a hydraulic pressure gauge to test system pressure under load. Most excavators operate at 2,500 to 3,500 PSI depending on the model. Start the engine and run it at idle, then engage each hydraulic function while monitoring pressure. Pressure that drops significantly below specification indicates pump wear, internal leakage, or valve problems. A pressure gauge costs $50 to $150 and provides objective data that visual inspection cannot.
Test each hydraulic function individually: boom raise, boom lower, stick extend, stick retract, bucket curl, bucket dump, house rotation, and track travel. Each function should respond smoothly and quickly. Sluggish response indicates pressure loss, worn pump internals, or clogged filters. Erratic movement or loss of control is a serious safety issue and a disqualifying red flag.
Listen carefully during operation. Whining or high-pitched noise suggests cavitation (air in the system) or pressure spikes. Grinding or chattering indicates internal damage to pump gears or motor components. Knocking sounds during load cycles suggest worn pump displacement or failing relief valves. These noises often precede catastrophic failure by weeks or months.
Identifying Seal Wear and Internal Damage
Fluid analysis provides insight into internal wear that visual inspection misses. A used excavator with 6,000 hours should have minimal metal particles in the fluid. High concentrations of iron, copper, or aluminum particles indicate bearing wear, gear damage, or piston ring failure inside pumps or motors. Many equipment dealers offer fluid analysis for $75 to $200, and the results guide your negotiation or decision to walk away.
Check the hydraulic filter condition. A clogged or dark filter indicates the system has been neglected. The filter element should be replaced as part of your post-purchase maintenance regardless of appearance. Inspect the filter housing for leaks or damage.
Examine the hydraulic tank for internal cleanliness if access is available. Sediment, rust, or debris inside the tank indicates poor maintenance and contamination risk. A clean tank with clear fluid is a sign the machine has been properly maintained.
Cab Interior and Control Functionality
Climb into the cab and close the door. Check that it latches properly and the seal is intact. Inspect the seat for tears, cracks, or severe wear. Test all controls, throttle, hydraulic joysticks, switches, and levers. They should move smoothly without sticking or grinding.
Check visibility. Look through all windows for cracks or damage. Test the backup alarm, horn, and lights. These aren't luxuries, they're safety systems. Check the ROPS (rollover protective structure) and FOPS (falling object protective structure) for cracks or deformation. These protect the operator.
Field Testing and Operation: Cycle Times and Performance
This is where you discover what the machine can actually do. Start the engine and let it warm up. Listen for unusual noises. Smooth operation is the goal; knocking, grinding, or excessive noise indicates problems.
Perform a full cycle test. Extend the boom fully, then retract it completely. Extend the stick fully, then retract it. Rotate the house 360 degrees in both directions. Lower the bucket fully, then raise it. Each movement should be smooth and responsive. Jerky or hesitant movement indicates hydraulic wear.
Test ground travel. Drive forward and backward, turning in both directions. The tracks should grip evenly and the machine should respond to control inputs. Listen for grinding, grinding, or unusual noises from the undercarriage.
Service Records and Documentation: The Used Excavator Buying Guide
Service records are your window into how the machine has been treated. A complete maintenance logbook is worth more than a low hour reading because it proves the machine has been cared for. Conversely, missing records or inconsistent documentation should lower your offer significantly or trigger a walk-away decision.
Verifying Maintenance History and Service Intervals
Request the complete service history, including oil and filter changes, hydraulic fluid flushes, track adjustments, and major repairs. A well-maintained excavator should have an oil change every 250 to 500 hours depending on operating conditions and the manufacturer's specifications. If the machine shows 4,000 hours but has only two oil changes on record, the maintenance is severely lacking or the hour meter has been tampered with.
Ask for documentation of major component replacements: engine overhauls, transmission rebuilds, hydraulic pump or motor replacement, track replacement, or boom repairs. These are expensive items that significantly extend the machine's remaining service life. A machine with a newly rebuilt engine at 5,000 hours may have more productive life remaining than a machine with 3,000 original hours and no major work.
Cross-reference service dates with hour meter readings. If the machine was serviced on January 15 at 2,000 hours and again on March 20 at 2,100 hours, that's 100 hours over 64 days, roughly 1.5 hours per day. If the next service is dated six months later at 2,200 hours, that's only 100 hours over 180 days, roughly 0.5 hours per day. Inconsistent usage patterns may indicate seasonal operation or may signal that records have been fabricated or the hour meter has been reset.
Detecting Hour Meter Tampering and Fraud
Hour meters are frequently tampered with to artificially lower the apparent age of a machine. Inspect the hour meter display for signs of physical tampering: scratches around the meter face, evidence of disassembly, or misaligned numbers. On older mechanical meters, the numbers should align perfectly; misaligned or slightly offset numbers indicate the meter has been opened and reset.
Compare the hour meter reading to the machine's physical condition. A machine showing 2,000 hours should have minimal wear on the seat, controls, and undercarriage. If the seat is torn, controls are stiff and worn, and the tracks show advanced wear, the actual hours are likely much higher. Wear patterns don't lie; they're difficult to fake.
Request the service records from the previous owner or dealer. Legitimate sellers have documentation. Sellers who claim records were "lost" or "the previous owner didn't keep them" are raising a red flag. Ask for the machine's registration or title history, which may show previous ownership transfers and service locations. Contact those previous owners directly if possible to verify the machine's history.
Verify the serial number matches all documentation: the title, the registration, the manufacturer's plate on the machine, and any warranty documents. Mismatched serial numbers indicate a stolen machine, a salvage title, or fraudulent documentation. Run the serial number through the manufacturer's database if available. Caterpillar, Komatsu, and Deere all maintain serial number registries that confirm original specifications and ownership history.
Identifying Red Flags in Documentation
Ask specifically about the machine's operational history: What was it used for? Was it in mining, construction, demolition, or landscaping? Machines used in abrasive environments like mining or quarrying experience accelerated wear compared to general construction use. A 5,000-hour mining excavator is more worn than a 5,000-hour general construction machine.
Request documentation of any major damage, repairs, or insurance claims. A machine that was dropped, struck, or involved in an accident may have structural damage that isn't immediately visible. Insurance claim records or repair invoices from body shops indicate the extent of damage and whether it was properly repaired.
Ask whether the machine has ever been flooded, submerged, or operated in saltwater environments. Water damage to the electrical system, engine, or hydraulics can cause failures months after purchase. Saltwater exposure accelerates corrosion and can cause hidden damage inside sealed components.
Request the original purchase invoice or lease agreement if available. This documents the machine's original specifications, original purchase price, and initial warranty terms. It also confirms the manufacturer and model year, which you can cross-reference against the serial number.
Documentation Checklist Before Purchase
Before you commit to a purchase, verify these documents:
- Complete service history with dates, hours, and work performed
- Original purchase invoice or lease agreement
- Title and registration with matching serial number
- Warranty documentation and transfer eligibility
- Proof of insurance coverage
- Any repair invoices for major work
- Operator manuals and parts documentation
- Fluid analysis reports if available
- Photographs of the machine at time of sale
If the seller cannot provide at least 80% of these documents, reduce your offer by 15-20% to account for the unknown maintenance history and increased risk. A machine with complete documentation commands a premium because you know exactly what you're buying.
Common Red Flags and Fraud Detection
Some warning signs should stop the sale immediately. Mismatched serial numbers between the machine and documentation indicate a stolen or salvaged machine. Altered hour meters, numbers that don't align properly or show signs of tampering, suggest the true operating hours are hidden.
Reluctance to provide service records, documentation, or allow a full inspection is a major red flag. Legitimate sellers have nothing to hide. Pressure to buy quickly or make a decision without inspection is a classic fraud tactic.
Prices significantly below market value for machines in good condition should trigger skepticism. If a deal seems too good to be true, it probably is. Request an independent inspection by a certified heavy equipment inspector if you have any doubts.
A used excavator can deliver tremendous value when you buy the right machine. The best inspection checklist for used excavators gives you the framework to make that decision confidently. When you're ready to list or acquire equipment, a Heavy Equipment Broker with access to multiple specialized platforms and global reach means you're not limited to local options or inflated dealer markups. Start your inspection process today, and you'll know exactly what you're buying before you sign the contract.
Frequently Asked Questions
What should I inspect first when buying a used excavator?
Start with a walk-around inspection to assess structural integrity, looking for cracks in the boom and stick, damage to the bucket, and signs of re-welding. Check the undercarriage for track wear and alignment. Then move to engine fluids, hydraulic systems, and cab controls. A thorough inspection checklist for used excavators typically takes 1-2 hours and prevents costly surprises after purchase.
How do you check the hydraulic system on a used excavator?
Inspect all visible hydraulic hoses and cylinders for cracks, leaks, and scoring on cylinder rods. Check hydraulic fluid level and condition, it should be clean and translucent. Perform a field test by operating the boom, stick, and bucket through full cycles; sluggish or jerky movement indicates seal wear or pressure loss. Consider a professional fluid analysis to detect contamination or internal wear.
What are the most common mechanical failures in used excavators?
Worn swing bearings, hydraulic seal failure, track degradation, and engine blow-by are frequent issues. Undercarriage wear is costly to repair; consistent track wear indicates balanced operation, while uneven wear suggests alignment problems. Service history is more valuable than low hour readings, documented oil and filter changes extend component life significantly and reduce the risk of hidden damage.
Why should I use Ironmartonline when selling my used excavator?
Ironmartonline connects your equipment to millions of potential buyers across nine specialized web-based selling platforms, maximizing your reach without contracts or hidden fees. Whether you're a contractor with surplus machinery, a fleet manager, or an owner-operator, the platform's professional marketplace ensures your excavator gets maximum exposure, helping you achieve the best net returns on your sale.
This article was written using GrandRanker