
Hydraulic Hammers: Complete Guide to Hydraulic Breakers for Excavators
Introduction to Hydraulic Hammers
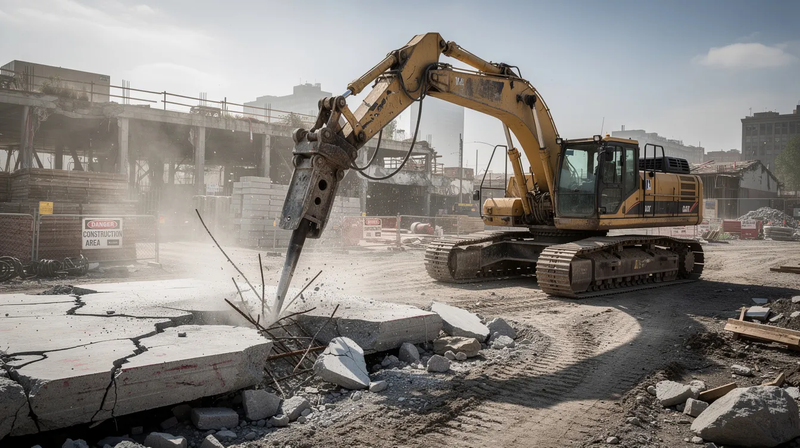
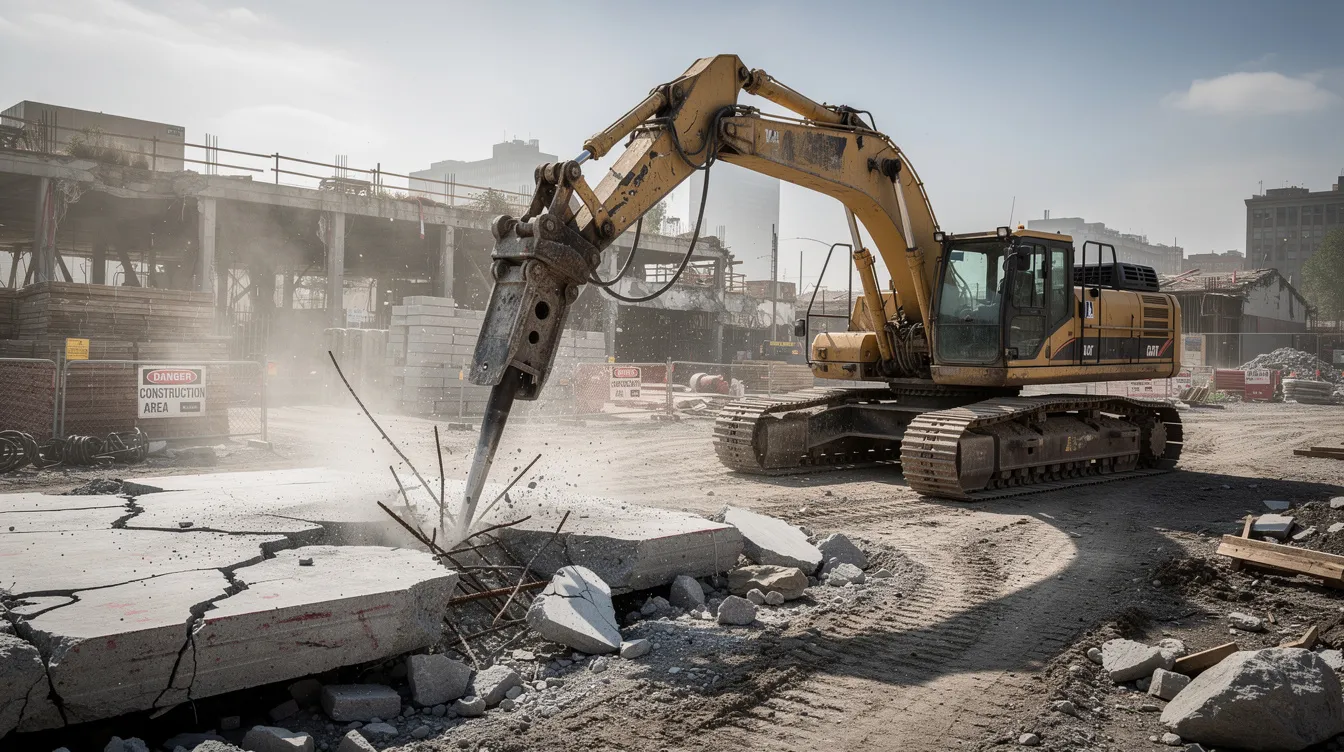
A hydraulic hammer is a powered attachment that mounts to the boom or arm of a carrier machine such as an excavator, backhoe, or skid steer loader. It converts pressurized fluid energy into high-speed mechanical impacts, driving a piston against a chisel or moil point to fracture hard materials. If you have ever watched a breaker tear through a concrete slab or split a boulder at a quarry, you have seen one in action.
The terms "hydraulic hammers" and "hydraulic breakers" are used interchangeably across the construction and demolition industries. You will see both on spec sheets, sales literature, and job site conversations. They mean the same thing.
Since the first models arrived on European construction sites in the 1960s, these attachments have become standard equipment for breaking concrete, rock, asphalt, and frozen ground. They offer higher energy efficiency compared to pneumatic jackhammers and have largely replaced manual breaking crews on medium- to large-scale projects.
This guide covers everything you need to know: how hydraulic hammers work, the main types and their applications, how to select and match one to your excavator, operation best practices, nitrogen management and accessories like the nitrogen charging kit, routine maintenance, safety, and what to look for when buying new or used. Whether you are an operator, fleet manager, or contractor evaluating your next purchase, the sections below will help you make informed decisions and get the most out of your equipment investment.
How Hydraulic Hammers Work
Understanding the internal mechanics of a hydraulic breaker helps you operate it correctly, troubleshoot problems faster, and communicate clearly with service technicians. Here is a simplified breakdown of the components and cycle.
-
Housing and mounting bracket. The outer casing protects internal parts and connects the breaker to the carrier's arm via pins or a quick coupler.
-
Piston (striker). A heavy steel cylinder that travels back and forth inside the housing. Its mass and velocity determine impact energy.
-
Tool (chisel or moil). The replaceable working end that contacts the material. It is held in place by retaining pins and guided by a bushing.
-
Nitrogen chamber / accumulator. A sealed chamber charged with dry nitrogen gas that stores energy during the upstroke and releases it during the downstroke.
-
Control valve. The internal control valve of a hydraulic hammer redirects hydraulic oil at the top of the piston stroke, reversing the cycle direction.
-
Hydraulic connections. A pressure line (in), a return line (out), and in many designs a case drain line that handles minor internal leakage.
The process begins when high-pressure oil enters the valve mechanism from the carrier's auxiliary hydraulic circuit. Oil flows into the front chamber, lifting the piston upward and compressing nitrogen behind it. Once the piston reaches the top of its stroke, the control valve shifts, redirecting oil flow and releasing the stored nitrogen energy. The combined force of hydraulic pressure and expanding gas drives the piston downward at high speed, striking the tool and delivering impact energy into the material.
In gas-assisted designs, nitrogen acts as both an energy booster and a recoil damper, smoothing pressure spikes that would otherwise travel back through the hydraulic hoses into the carrier's pump. Fully hydraulic designs skip the nitrogen chamber entirely and rely on valve timing and oil pressure alone for both strokes. Gas-assisted models are more common on medium and heavy breakers because of their superior energy output and smoother operation.
A key advantage over older pneumatic technology is that no separate compressor is needed for hydraulic hammers, since they utilize the carrier's existing hydraulic system. This also eliminates the energy loss of external air compressors, making the overall system more efficient and simpler to set up on site.
Main Types of Hydraulic Breakers
Hydraulic breakers are classified by their physical design and by the size of the carrier they are engineered to work with. Choosing the right category determines whether the attachment fits your machine and handles your material.
By carrier size:
-
Small / mini breakers. Designed for mini excavators and compact equipment under roughly 2 to 6 tons. These units weigh approximately 50 to 200 kg and operate at high blow rates with lower impact energy, making them suitable for landscaping and light demolition applications, trenching, and utility work.
-
Medium breakers. Built for 6 to 20 ton excavators. Weight ranges from about 200 to 700 kg, with impact energies in the 2 to 10 kJ range. These are workhorses for general construction, road repair, and foundation removal.
-
Heavy-duty breakers. Matched to 20 to 80 ton excavators and larger, weighing 700 to 2,500 kg or more. They deliver impact energies of 8 to 40 kJ per blow at lower blow rates (150 to 600 bpm). Primary and secondary demolition, quarrying, and hard rock applications are their territory.
By design variation:
-
Side-mount breakers. The mounting bracket attaches to the side of the housing. Common on older designs and certain OEM configurations.
-
Top-mount breakers. The bracket sits above the main body, offering a more compact profile and often better visibility for the operator.
-
Silent / boxed hammers. An enclosed housing surrounds the working mechanism, dampening airborne noise and reducing vibration transmitted to the carrier. These are the preferred choice for urban demolition, night work, and jobs near noise-sensitive structures.
Manufacturers like HydroRam offer a Severe-Duty Series of hydraulic hammers built with heavier components and reinforced housings for demanding quarry and mining environments. Over 1,500 HydroRam hammers are in service worldwide, reflecting proven durability in tough conditions.
Key Applications of Excavator Hydraulic Hammers
Excavator hydraulic hammers appear on virtually every type of job site where hard materials need to be broken without explosives. Their flexibility comes from the range of carrier sizes, interchangeable tool bits, and the precision they provide.
-
Breaking reinforced concrete. Slabs, foundations, bridge decks, retaining walls, and footings on infrastructure projects. Hydraulic hammers are used for breaking concrete and asphalt on everything from residential renovations to highway reconstruction.
-
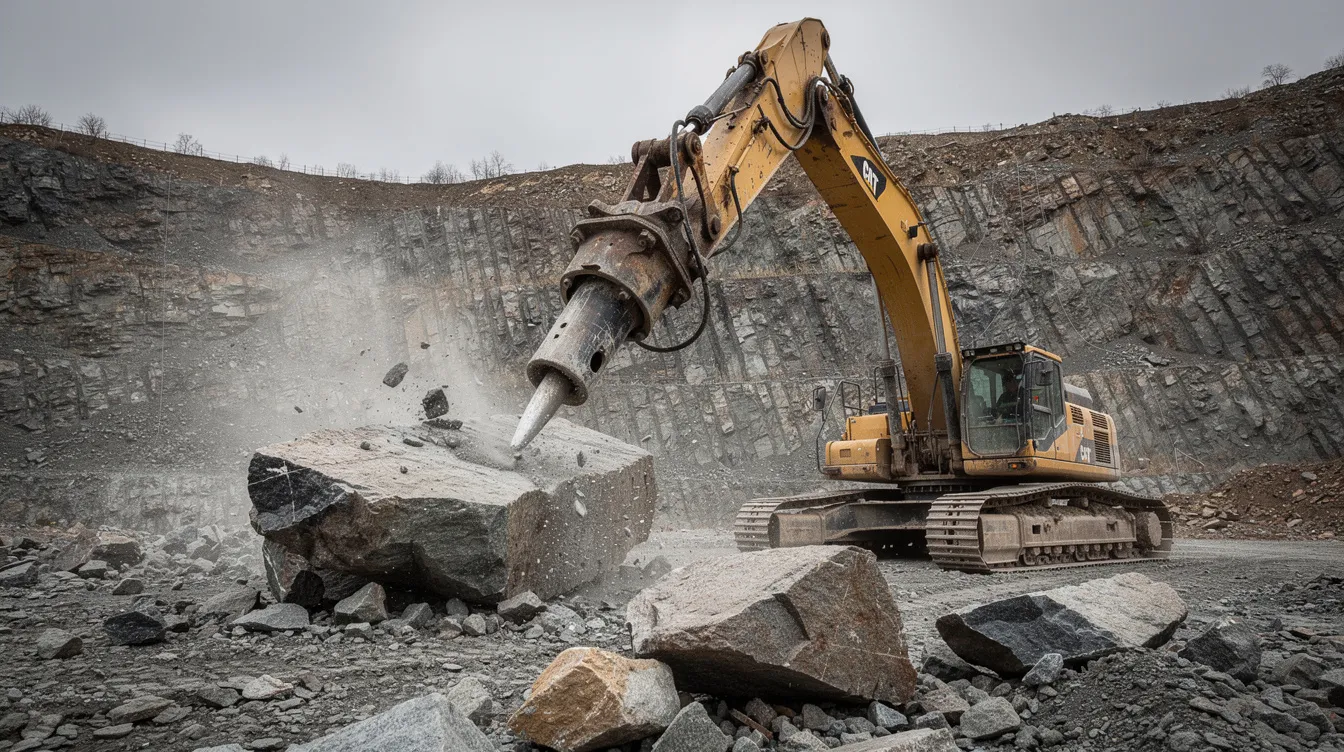
Rock and quarry operations. Secondary breaking of oversize boulders that do not fit the crusher, bench scaling to remove loose rock faces, and selective removal in areas where blasting is restricted. Hydraulic hammers are used in mining and quarrying applications globally.
-
Asphalt and roadwork. Removing worn pavements, sidewalks, and road surfaces for repair and replacement. Specialized asphalt cutter bits speed the process.
-
Utility and municipal work. Trenching through rock for pipe and cable installation, opening frozen ground for utility repairs in winter, and cutting openings for manholes. Hydraulic hammers can break frozen ground for utility repairs even in extreme cold.
-
Underground mining and tunneling. Hydraulic hammers can also scale in underground mining or tunneling, removing loose material from tunnel faces and walls in fractured rock zones where drill-and-blast is impractical. Istanbul's metro tunnels, for example, have used hydraulic impact hammers since the 1970s in exactly this kind of environment.
-
Industrial applications. Slag breaking at steel plants, concrete recycling, and dismantling industrial structures.
They are suitable for controlled demolition in confined areas where blasting is impractical, and they provide good control, allowing for precise fracturing of material. This means operators can target specific sections without harming surrounding structures.
Selecting the Right Hydraulic Breaker for Your Machine
Getting the breaker size wrong is one of the most expensive mistakes a buyer can make. An oversized attachment strains the boom, causes structural fatigue, and transmits excessive vibration through the carrier. An undersized unit bounces off hard rock, wears tools prematurely, and drags out cycle times. Selection starts with three numbers from your excavator's spec sheet.
-
Carrier operating weight. The breaker manufacturer's compatibility chart lists a weight range in tons. A 5 to 8 ton excavator, for example, typically pairs with a 300 to 500 kg class breaker.
-
Hydraulic flow. Measured in liters per minute or gallons per minute. That same 5 to 8 ton machine usually supplies 45 to 80 l/min from its auxiliary circuit. The breaker's required flow must fall within this range.
-
Working pressure. Measured in bar or psi. Common working pressures for mid-range excavators are 140 to 160 bar. The breaker must be rated to operate within the carrier's available pressure.
Beyond these three, consider the material you will be breaking most often. Breaking concrete on a commercial demolition job is different from splitting granite in a quarry. Harder materials call for higher impact energy per blow and lower blow rates, while softer materials like asphalt benefit from higher bpm at moderate energy. Duty cycle matters too-continuous quarry use demands heavier construction than occasional trenching.
If your excavator sits right at the boundary between two breaker sizes, choose the smaller unit. You protect the carrier from overloading and can always step up later if the work demands it.
Matching a Hydraulic Hammer to an Excavator or Skid Steer
Compatibility extends beyond weight class. The carrier's auxiliary hydraulic circuit must supply the correct flow, pressure, and return path for the breaker to operate safely and at full power.
-
Auxiliary circuit specifications. Check the carrier's auxiliary flow rate, max pressure, and whether it provides a free-flow return line. Many breakers also require a case drain line to handle minor internal leakage. Blocking the case drain can pressurize the housing and blow seals.
-
Mounting style. Pin-on brackets are specific to each carrier model and offer the most rigid connection. Quick couplers add versatility for switching between attachments but must be rated for breaker use. Standard digging couplers may not handle the sustained impact loads.
-
Hydraulic hoses. Confirm that hydraulic hoses from the carrier are the correct hose diameter and pressure rating for the breaker. Undersized hoses restrict flow and cause pressure drops; oversized hoses add unnecessary weight and cost.
-
Steer loaders and compact track loaders. These carriers typically have lower flow and pressure limits than excavators of similar weight. Cooling capacity is also tighter on compact machines. Verify that the loader's hydraulic system can sustain breaker operation without overheating, and ensure the mounting frame provides adequate stability during impact. Flow control valves or circuit modifications may be required.
Before first use, have a qualified technician verify pressure and flow settings against the breaker manufacturer's specifications. Incorrect setup is a common source of premature failure and voided warranties.
Hydraulic Hammer Specifications and Performance Metrics
Spec sheets can look intimidating if you do not know which numbers matter most. Here is what to focus on when comparing models.
-
Impact energy. Measured in Joules (J) or foot-pounds (ft-lb). This is the energy delivered per blow and governs how effectively the breaker fractures hard materials. Hydraulic hammers deliver high impact energy per blow, allowing rapid fracturing of hard rock, reinforced concrete, and other tough materials.
-
Blows per minute (bpm). How fast the piston cycles. Higher bpm means more strikes per minute, which improves productivity on softer materials. There is a trade-off: increasing impact energy usually reduces bpm and vice versa.
-
Operating weight. The total weight of the breaker without mounting bracket. Hydraulic hammers can weigh up to 180 lbs for compact units, while heavy-duty models can exceed 2,500 kg.
-
Tool / chisel diameter. The diameter of the chisel shank, which must match the breaker's lower bushing. Chisel diameter for some compact hammers is 35 mm, while large quarry breakers use tools of 105 to 135 mm.
-
Oil flow and pressure. Flow rate for smaller hydraulic hammers is typically 10 to 30 l/min, while large units may require over 150 l/min. Working pressure ranges from 80 to 110 kg/cm³ on compact models up to 180 bar or higher on heavy-duty units.
Productivity on a given job is roughly proportional to impact energy multiplied by bpm. A compact breaker might operate at 500 to 1,200 bpm with modest energy per blow, ideal for fast surface work. A heavy quarry breaker may hit at only 300 bpm but each blow carries tens of kilojoules of energy.
Example compact spec set: A unit weighing approximately 180 lbs, operating at 500 to 1,200 bpm, requiring 10 to 30 l/min oil flow, with a 35 mm chisel diameter. This kind of breaker is perfect for skid steer loaders and mini excavators doing utility trenching, sidewalks removal, or light demolition.
For a real-world comparison, Volvo's HB series top-mount breakers range from the HB02 at roughly 150 kg with 19 to 38 l/min flow requirements up to the HB21 at about 1,700 kg requiring 85 to 155 l/min. Sound power levels across the range run from 110 to 124 dB(A).
Common Tool Bits for Hydraulic Breakers
Choosing the right tool bit is just as important as choosing the right breaker. The wrong chisel wastes energy, accelerates wear, and slows production. Hydraulic hammers can handle various tasks by using interchangeable tool bits designed for specific materials and conditions.
-
Moil point. A sharp, conical tip for precise breaking, line drilling, and following natural fracture lines in rock. The most versatile option and the default choice for general demolition.
-
Blunt / flat tool. A wide, flat striking face for tougher materials where the moil point would deflect. Good for compacted concrete and hard rock where penetration is less important than spreading impact force.
-
Chisel. A wedge-shaped edge for cutting slots, scoring concrete, and creating clean break lines. Commonly used in controlled demolition where edges need to be straight.
-
Wide chisel. A broader version of the standard chisel for scabbing concrete surfaces or removing thin layers of material.
-
Asphalt cutter. Features a wider profile and sometimes carbide inserts for faster cutting through asphalt layers during road surface removal.
-
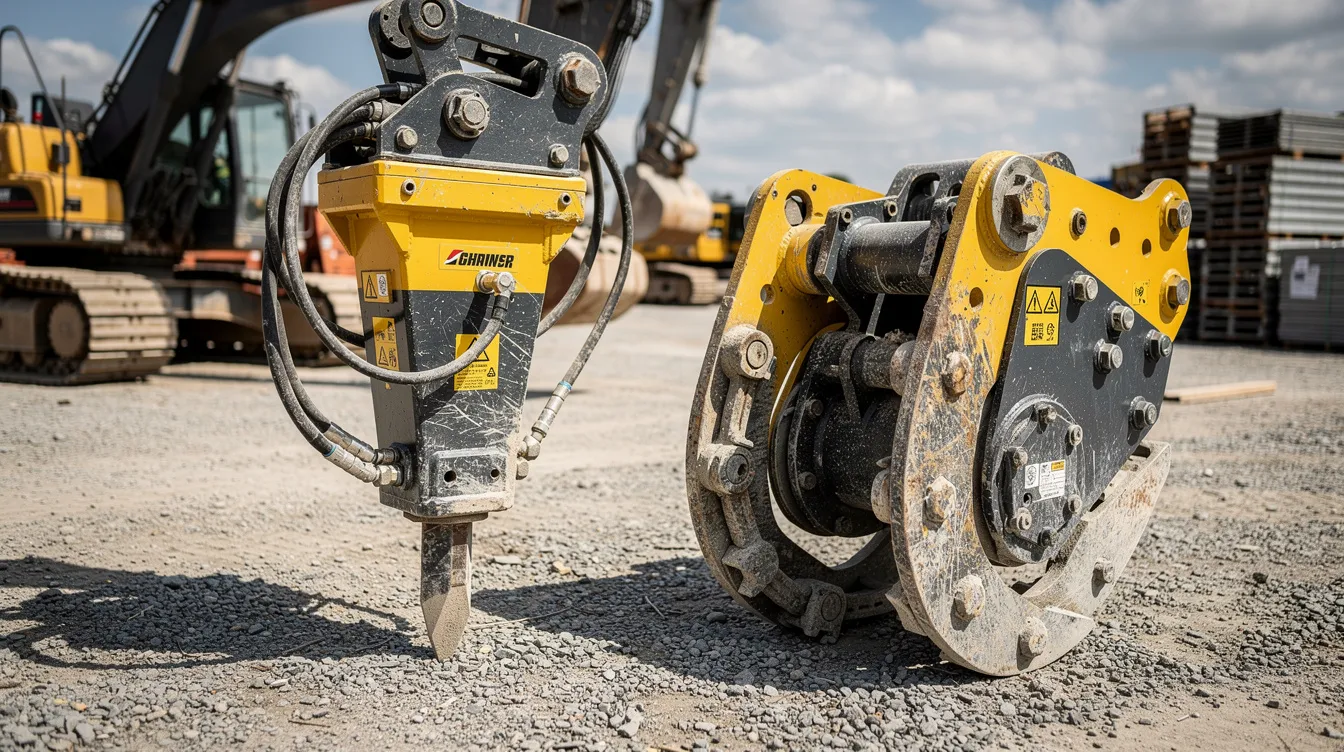
Compaction plate. Replaces the chisel for soil compaction tasks, effectively turning the breaker into a plate compactor for trench backfill.
Tool steel quality, heat treatment (quench and temper), and tip geometry all affect how long a bit lasts and how efficiently it transfers energy. Shorter tools transmit energy more directly but penetrate less deeply per blow. Longer tools offer more reach but flex under load and wear faster. Always match the tool diameter to the breaker's lower bushing specification.
Hydraulic Hammer Operation Best Practices
Proper technique is the difference between a productive shift and a repair bill. Most premature hammer failures trace back to operator habits, not manufacturing defects.
-
Position the tool perpendicular to the material. Angled strikes create side loads on the tool, bushing, and piston, leading to cracking and accelerated wear.
-
Maintain firm down-pressure from the carrier. The excavator's boom should hold the tool firmly against the surface. Enough pressure to keep constant contact, not so much that you are lifting the front of the machine.
-
Never pry with the tool. Using the breaker as a lever to move broken pieces is one of the fastest ways to crack tie rods, deform the tool, and damage the housing.
-
Limit blow duration on one spot to 10 to 20 seconds. If the material has not broken after 15 to 20 seconds of continuous hammering, reposition. Staying in one place overheats the tool and valve, wastes energy, and can damage the piston.
-
Keep the tool tip in constant contact with the material. Dry firing, which is cycling the hammer without the tool touching anything, sends the full piston impact into internal components instead of the workpiece. This causes rapid wear and can crack the piston or housing.
-
Use the boom and arm smoothly. Track existing cracks and fracture lines with controlled arm movements. Jerky repositioning increases rebound and operator fatigue.
-
Respect duty cycle limits. Breakers are not designed for non-stop max-load operation all day. Schedule brief rest periods, especially in hot weather, to let hydraulic fluid and internal components cool.
They offer precision and control for targeted demolition without harming surrounding structures, but only when operators follow these fundamentals.
Proper Use of Nitrogen in Hydraulic Hammers
Most medium and heavy hydraulic hammers include a nitrogen chamber positioned above or behind the piston. This is not a minor detail. Nitrogen management directly affects performance, component life, and carrier protection.
Correct nitrogen pressure does three things simultaneously. It stores energy during the piston's upstroke and releases it during the downstroke, boosting impact power. It absorbs pressure spikes that would otherwise travel back through hydraulic hoses and damage the carrier's pump and valves. And it dampens recoil, making the hammer smoother to operate.
Signs of incorrect nitrogen charge:
-
Reduced blow energy and slower material breakage
-
Excessive vibration felt through the carrier's cab and boom
-
A harsh metal-on-metal feel or sound during operation
-
Supply hoses visibly "hopping" or pulsing
-
Inconsistent blow rhythm
When a problem occurred related to nitrogen loss, the consequences can cascade quickly. Low charge means the piston bottoms out harder, stressing seals, tie rods, and the carrier's hydraulic system.
Only dry nitrogen may be used for charging. Compressed air introduces moisture that corrodes internal surfaces, and oxygen at the temperatures and pressures inside the chamber can cause combustion or even explosion. This is a non-negotiable safety rule.
Specific charge pressures vary by model. For reference, Caterpillar MH-series hammers require approximately 4,500 kPa (about 650 psi) of nitrogen pre-charge. Always consult your specific hammer's manual.
Nitrogen Charging Kit: Purpose and Components
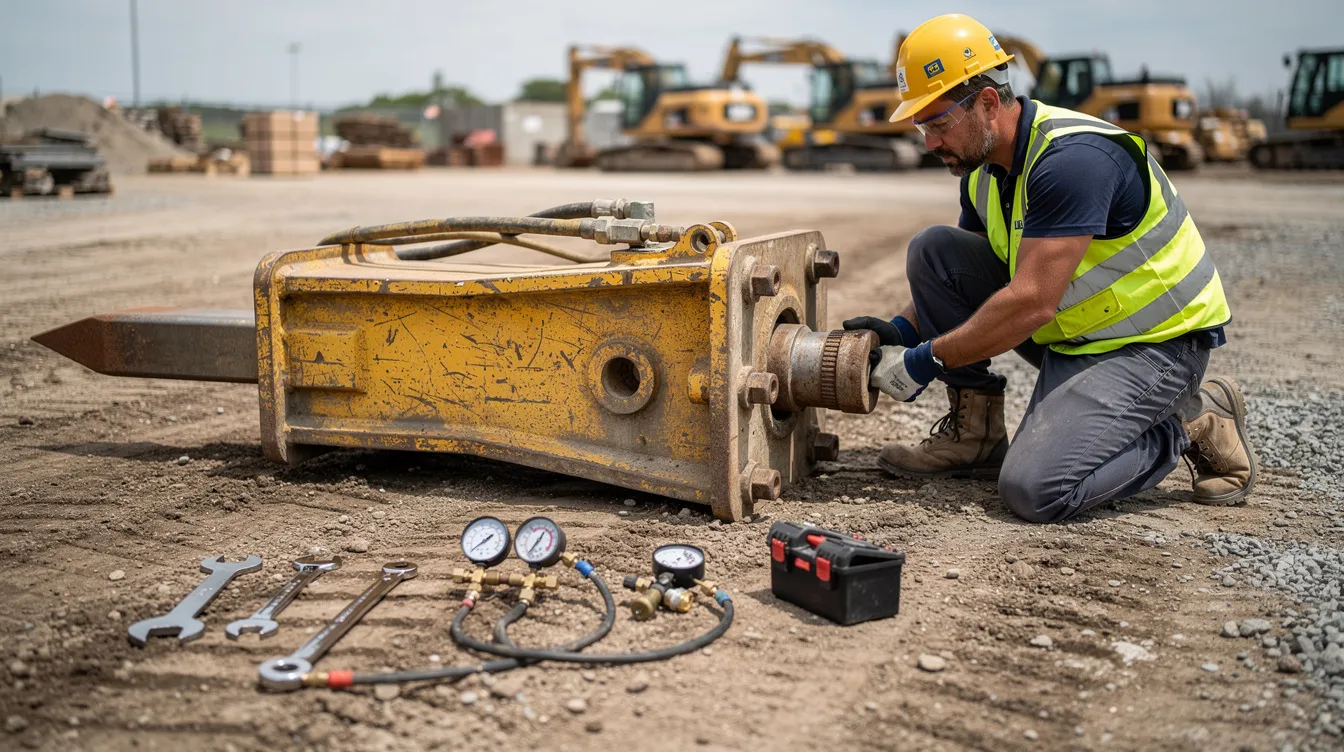
A nitrogen charging kit is an essential accessory for any operation running gas-assisted hydraulic breakers. Without one, checking or adjusting nitrogen pre-charge requires a trip to the dealer, costing downtime and transport expenses.
Typical kit contents:
-
High-pressure gauge calibrated for the hammer's operating range
-
Charging hose with fittings rated for nitrogen service
-
Shut-off valve for controlled gas release and filling
-
Adaptors for different hammer models and valve configurations
-
Carrying case for organized storage and transport
The kit connects to the hammer's accumulator or gas chamber via a fill port, usually located on the backhead or upper housing. Some models use a Schrader-type valve, while others require proprietary fittings.
General safety rules for nitrogen handling:
-
Always wear eye protection when connecting or disconnecting the charging hose.
-
Never exceed the manufacturer's specified charge pressure.
-
Keep oil and grease away from nitrogen fittings. Hydrocarbon contamination under pressure is a fire risk.
-
Bleed residual pressure from the hose before disconnecting.
-
Store nitrogen cylinders upright and secured against tipping.
Do not attempt to charge the hammer while it is operating or while the hydraulic system is pressurized. Follow lockout/tagout procedures on the carrier before any nitrogen service work.
Routine Maintenance for Hydraulic Breakers
Regular maintenance prevents downtime and expensive repairs. Most hammer failures are traceable to neglected daily or weekly checks. Hydraulic hammers can last 8 to 10 years with proper maintenance, but that lifespan shortens dramatically without it.
Daily tasks:
-
Visual inspection of the tool, retaining pins, and lower bushing for cracks, excessive wear, or looseness
-
Check for hydraulic fluid leaks at all connections, hose fittings, and around the housing
-
Grease the tool bushing and shank per manufacturer schedule (often every 1 to 2 hours of operation)
-
Inspect mounting hardware for tightness
Weekly or monthly checks:
-
Measure tool wear and bushing clearance. Excessive clearance causes misalignment and piston damage.
-
Verify torque on tie rod bolts and mounting bracket fasteners.
-
Inspect hydraulic hoses for cuts, abrasion, bulging, or fitting leaks. Replace any hose that shows surface damage.
-
Check the carrier's hydraulic oil level and condition.
Scheduled service (per manufacturer intervals):
-
Verify nitrogen pre-charge pressure with a nitrogen charging kit.
-
Inspect seals and replace if leaking or hardened.
-
Check accumulator bladder or diaphragm integrity.
-
Replace wear parts (bushings, thrust rings, tool retaining pins) as measurements dictate.
-
Full seal kit replacement at recommended hours or annually, whichever comes first.
Keep a maintenance log for each breaker. Service history is critical for warranty claims, resale value, and troubleshooting recurring issues.
Lubrication and Greasing Practices
Lubrication is the single cheapest form of insurance for a hydraulic breaker. Skipping it is also the single fastest way to destroy one.
-
Grease type. Use a specialized breaker grease rated for high temperature and high pressure, typically containing solid lubricant additives like molybdenum disulfide or graphite. Standard chassis grease does not hold up under the heat and impact forces inside a hammer.
-
Re-greasing intervals. During continuous operation, most manufacturers recommend greasing the tool shank and bushing every 1 to 2 hours, or every few hundred blows. Some models specify shorter intervals for hard rock work.
-
Auto-lube systems. Automatic greasing systems deliver metered amounts of grease to the tool bushing at preset intervals without operator intervention. They reduce the risk of missed greasing cycles and are a worthwhile investment for high-duty applications where the hammer runs for hours at a time.
-
Manual greasing. Requires discipline. If a crew forgets a single greasing cycle on a hot day, tool seizure can follow within minutes. A seized tool means pulling the breaker off the carrier, pressing out the stuck chisel, and often replacing the lower bushing.
Consequences of poor lubrication:
-
Tool seizure in the bushing
-
Premature bushing wear and out-of-spec clearance
-
Piston scoring from debris drawn into the cylinder
-
Increased operating temperature and accelerated seal degradation
Hydraulic System Considerations and Carrier Setup
Breaker performance is only as good as the hydraulic system feeding it. A perfectly maintained hammer will underperform or fail prematurely if the carrier's hydraulic circuit is not set up correctly.
-
Dedicated auxiliary circuit. The breaker should run on a single-acting auxiliary circuit with free-flow return where specified by the manufacturer. Back-pressure in the return line robs impact energy and overheats oil.
-
Oil temperature. Hydraulic fluid temperature must stay within the manufacturer's recommended range, typically below 80°C (176°F) for most mineral-based oils. Hot oil loses viscosity, reduces impact energy, increases internal leakage, and accelerates seal wear. Monitor oil temperature gauges, especially during summer operations.
-
Filtration. Contaminated oil is a leading cause of valve and seal damage. The carrier's hydraulic system should meet or exceed the breaker manufacturer's cleanliness standard, often ISO 18/16/13 or better. Inspect and replace filters on schedule.
-
Oil type and viscosity. Use the hydraulic fluid grade specified in the carrier and breaker manuals. Mixing brands or viscosities creates unpredictable performance and warranty headaches.
-
Pressure and flow adjustment. Before first use and after any carrier or breaker service, a qualified technician should verify that auxiliary circuit pressure and flow match the breaker's requirements. Over-pressure causes overheating and component stress; under-pressure causes weak blows and wasted time.
Safety Guidelines for Using Hydraulic Hammers
High impact energy, flying debris, extreme noise levels, and pressurized systems make hydraulic breaker operations inherently hazardous. Strict safety measures protect the operator, nearby workers, and the public.
-
PPE requirements. Hard hat, hearing protection (rated for 110 dB or higher), safety glasses or face shield, heavy-duty gloves, steel-toed boots, and high-visibility clothing. Every person within the work zone must wear full PPE.
-
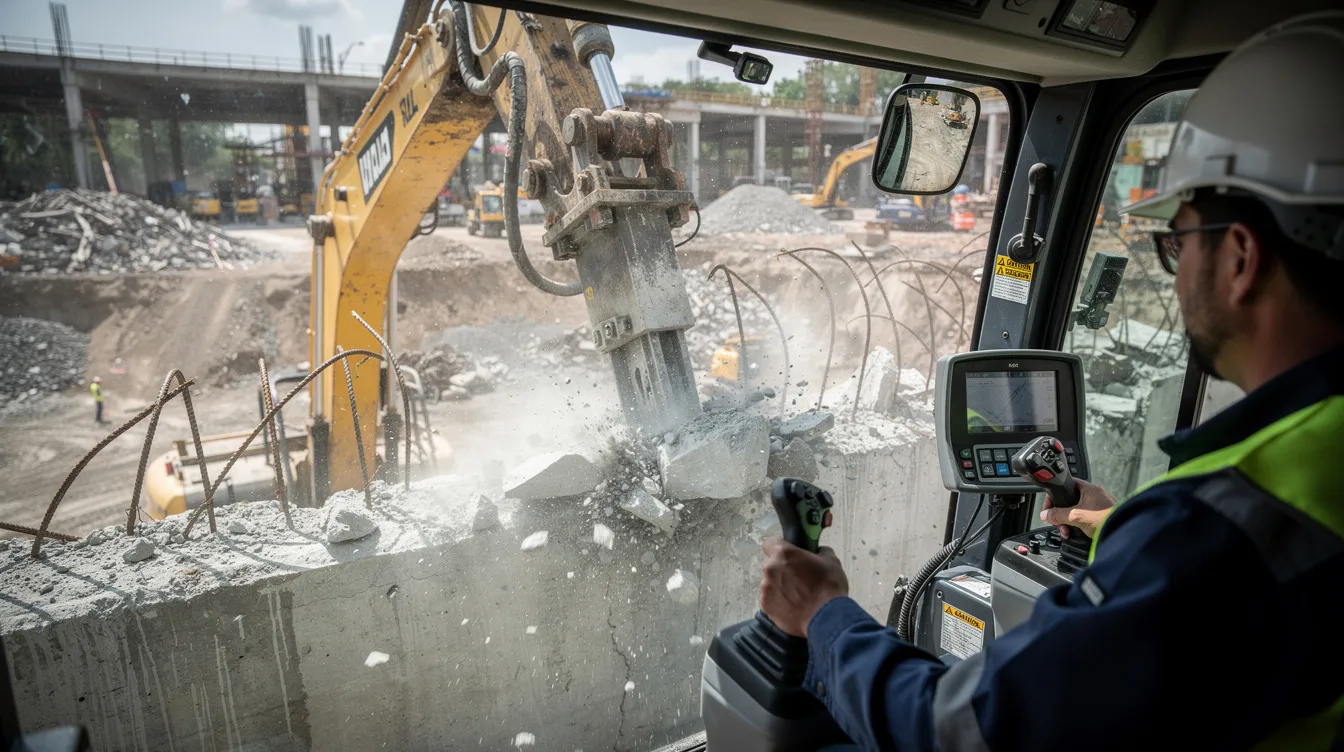
Operator protection. Hydraulic hammer operators are kept safe inside the cab of the carrier machine, shielded from debris and buffered from vibration. Ensure cab windows are intact and rated for the work environment.
-
Safe work zones. Establish exclusion zones around the operating breaker. For heavy-duty units, debris can travel significant distances. Barricades, signage, and spotters help enforce safe distances for bystanders.
-
Lockout/tagout. Before servicing the breaker, connecting a nitrogen charging kit, or inspecting internal components, shut down the carrier, relieve hydraulic pressure, and follow lockout/tagout procedures. Pressurized systems can release stored energy violently.
-
Pre-job site assessments. Locate underground utilities (gas, water, electric, telecom) before breaking ground. Identify overhead hazards such as power lines and unstable structures. When working near occupied buildings, assess vibration sensitivity and set up monitoring if required.
-
Cold weather. In freezing conditions, use low-temperature seal kits and allow the carrier's hydraulic system to warm up before operating the breaker. Cold hydraulic fluid is sluggish and increases stress on seals.
Common Operating Mistakes and How to Avoid Them
Improper use is the number one cause of premature hammer failure. Most of these mistakes are avoidable with basic training and awareness.
-
Prying with the tool. Using the breaker as a lever to shift broken material. This bends or cracks the tool, breaks tie rods, and can crack the housing. Instead, use the excavator bucket or a separate attachment to move debris.
-
Side-loading. Striking at an angle rather than perpendicular to the surface. Side loads stress the tool, bushing, and piston guides, leading to oval wear and misalignment. Reposition the carrier so the tool meets the material squarely.
-
Dry firing. Running the hammer without the tool in contact with material. Piston energy goes into internal stops rather than the workpiece, causing shock damage. Always confirm tool contact before activating.
-
Running continuously in one spot. Hammering beyond 15 to 20 seconds without repositioning overheats the tool and valve, and can weld the tool tip into the material. Move to a nearby point, break the surrounding area, and return.
-
Incorrect nitrogen pressure. Too low means loss of cushioning and harsh metal-on-metal impact. Too high means the piston cannot complete its stroke, reducing blow energy. Check pre-charge at the intervals your manufacturer specifies.
-
Ignoring hydraulic oil condition. Dirty, hot, or low oil starves the hammer and damages the control valve. Monitor oil level, temperature, and cleanliness daily.
Each of these errors causes specific damage: cracked tools, broken tie rods, scored pistons, cracked housings, and carrier boom fatigue cracks. Avoiding them costs nothing. Fixing them costs thousands.
Noise, Vibration, and Environmental Considerations
Hydraulic breakers are loud. Spec sheets commonly show sound power levels between 110 and 124 dB(A) depending on size. Regulations in many jurisdictions restrict equipment noise, especially in urban areas and during night work.
-
Boxed / silenced hammers. Enclosed housing designs reduce airborne noise by several decibels compared to open-frame breakers. They are significantly quieter than blasting methods or uninsulated air-powered tools. If your projects regularly take you into residential neighborhoods or near hospitals and schools, a silent hammer is worth the premium.
-
Vibration transmission. Impact vibration travels through the tool, into the mounting bracket, and up through the carrier's boom and cab. Worn bushings and loose mounting hardware amplify this effect. Proper installation, torque checks, and timely bushing replacement minimize vibration transfer.
-
Dust suppression. Breaking concrete and rock generates dust. Water spray systems, misting attachments, or simple hose-down between cycles help keep dust within regulatory limits and improve visibility.
-
Work-hour restrictions. Many municipalities limit construction noise to specific hours. Plan breaker work within permitted windows and use silent models when operating near the boundary.
-
Compliance documentation. Keep sound level and vibration test records on file. Some clients and municipalities require proof that equipment meets local noise ordinances before allowing work to begin.
Hydraulic Hammer Accessories and Optional Equipment
The right accessories can increase uptime, extend service life, and make the hammer more versatile across different job conditions.
-
Nitrogen charging kit. Essential for in-house pre-charge checks and top-ups. Eliminates dealer trips and reduces downtime. See the dedicated section above for details.
-
Automatic greasing system. Delivers grease to the tool bushing at programmed intervals, reducing the risk of missed lubrication and freeing operators from manual greasing during production hours.
-
Mounting brackets. Different carriers require different brackets. Stock the brackets you need for your fleet so the same hammer can move between machines quickly.
-
Tool racks and storage. Organized storage for spare chisels, moil points, and retaining pins keeps accessories accessible and protected.
-
Cold-weather kits. Low-temperature seals and compatible hydraulic fluid for operations in sub-zero conditions.
-
Underwater kits. Sealed housings and specialized hose assemblies for marine demolition, dam work, or underwater rock removal.
Select OEM or high-quality aftermarket products to maintain warranty coverage and reliability. Cheap seals or off-spec grease can cause more inconvenience than they save.
Rebuilding, Servicing, and Reconditioning Hydraulic Breakers
A well-built hydraulic breaker is not disposable. Many units go through multiple rebuilds over their life, each time returning to near-original performance at a fraction of new-unit cost.
What typically gets replaced during a rebuild:
-
Complete seal kit (all internal and external seals)
-
Lower and upper bushings
-
Tool and retaining pins if worn beyond spec
-
Tie rods (if stretched, cracked, or corroded)
-
Accumulator bladder or diaphragm
-
Control valve components (spool, springs, seats)
-
Wear rings and thrust washers
Rebuilding vs. buying new:
-
A full rebuild typically costs 30 to 50 percent of a new hammer's price.
-
Downtime for a rebuild may be one to two weeks depending on parts availability and shop backlog.
-
A rebuild extends life significantly but will not fix a cracked housing or severely scored piston bore. At that point, replacement is the better choice.
-
Rebuilt units should be tested on a bench or carrier before returning to service to confirm correct blow rate, impact energy, and absence of leaks.
Use experienced hydraulic breaker specialists for major repairs. General hydraulic shops may lack the fixtures, knowledge, and torque specs specific to breaker internals. Poorly assembled hammers fail fast and can damage the carrier.
Comparing Hydraulic Hammers to Other Demolition Tools
Hydraulic breakers are not the only option for demolition and material reduction, but they cover the widest range of applications for their weight class.
-
Crushers and pulverizers. Hydraulic crushers grab and crush concrete with rebar, processing material faster on large-scale demolition but without the precision of a hammer. They excel at high-volume secondary demolition but struggle with thick, heavily reinforced sections where a breaker's pointed impact is more effective.
-
Shears. Steel cutting shears slice through structural steel, rebar, and sheet metal. They complement breakers on demolition jobs but do not replace them for concrete or rock work.
-
Handheld electric or pneumatic breakers. Suitable for small, localized tasks like chipping tile, cutting small openings, or light surface work. They cannot match the power, speed, or reach of a machine-mounted hydraulic hammer.
-
Blasting. Explosives break large volumes of rock quickly but are prohibited in urban areas, near utilities, and in many confined spaces. Hydraulic hammers offer a safer, more controlled alternative in these situations.
Hydraulic hammers reduce labor requirements by replacing manual jackhammer crews with a single operator in the cab of an excavator. On thick concrete, hard rock, and in confined spaces where blasting is impractical, a hydraulic breaker is typically the most efficient and cost-effective choice.
Cost Factors and Total Cost of Ownership
Purchase price is the most visible expense, but it is only the beginning. Total cost of ownership determines whether your hammer pays for itself.
Cost elements to track:
-
Acquisition cost. New prices range widely depending on size, brand, and features. A compact breaker for a mini excavator might cost a few thousand dollars; a heavy-duty quarry hammer can run well into five figures.
-
Installation. Mounting brackets, hydraulic circuit modifications, hose kits, and technician time for setup and calibration.
-
Consumables. Replacement tools (chisels), bushings, retaining pins, grease, and nitrogen. Tool replacement is often the single largest ongoing expense.
-
Maintenance labor. Greasing, inspections, nitrogen checks, and seal replacements. Auto-lube systems reduce labor but add upfront cost.
-
Carrier fuel. Breaker operation demands high hydraulic flow, which increases engine load and fuel consumption. Inefficient breakers or poor technique raise fuel usage further.
-
Downtime. Every hour the hammer sits idle for repairs or parts is an hour of lost production. Reliability and parts availability directly affect this number.
Low-cost vs. premium scenario:
A budget-priced hammer may save 30 percent on purchase but require tool changes twice as often, consume more grease due to looser tolerances, and need a full rebuild a year earlier. Over a five-year period, the premium unit with durable wear parts and longer service intervals often costs less per cubic meter of material broken.
Correct sizing and proper operation lower lifetime cost more than any other single factor. An oversized hammer wastes fuel and accelerates carrier wear. An undersized hammer drags out jobs and burns through tools. Getting the match right is the ideal starting point for controlling costs.
Hydraulic Breakers in Different Industries
Since the late 20th century, hydraulic breakers have expanded from their origins in European demolition and tunneling into virtually every industry that works with hard materials.
-
Construction (commercial, residential, infrastructure). Foundation removal, slab demolition, trench rock, bridge deck replacement, and building renovation. Customers in this segment value versatility and the ability to switch between breaker sizes and tool types across projects.
-
Quarrying and mining. Secondary reduction of oversize material, bench scaling, face cleanup, and ore handling. Heavy-duty breakers with proven durability are essential here because downtime in a quarry directly impacts crusher throughput and revenue.
-
Municipal and utilities. Water main repairs, sewer line access, manhole cutting, curb and sidewalk replacement, and frozen ground penetration. Compact and medium breakers on backhoe loaders and small excavators handle most of this work.
-
Recycling yards. Breaking concrete for aggregate recovery and processing demolition waste.
-
Steel and industrial plants. Slag breaking in furnace areas, refractory removal, and dismantling of reinforced concrete structures inside operating facilities.
Concise examples:
-
A highway project removing a bridge deck uses a 2,000 kg breaker on a 45-ton excavator to fracture the reinforced concrete slab into manageable pieces for removal.
-
A pipeline contractor uses a 500 kg breaker on a 13-ton excavator to trench through limestone for a water main installation.
-
A steel plant uses a specialized breaker to break cooled slag before it is hauled to recycling.
Future Trends in Hydraulic Hammer Technology
Hydraulic breaker technology continues to evolve, driven by the construction industry's expectations for higher productivity, lower operating costs, and reduced environmental impact.
-
Better noise and vibration damping. Next-generation silent housings use advanced polymer buffers and multi-layer insulation. Research published in MDPI's Machines journal explores optimized nitrogen-hydraulic combined designs that improve piston energy storage and reduce transmitted vibration.
-
Energy recovery systems. Improved valve timing and accumulator designs capture more of the piston's recoil energy, converting it into useful downstroke power. This raises efficiency without increasing oil flow demand.
-
Improved tool steels and coatings. Advances in metallurgy, including higher-strength steels, carbide coatings, and refined heat treatment processes, extend tool life and reduce consumable costs.
-
Integrated monitoring. Sensors that track blow count, piston cycle count, nitrogen pre-charge loss, tool wear, and vibration feedback are moving from optional extras to standard features. Data streams integrate with the excavator's telematics platform, enabling predictive maintenance and capturing real-time performance data.
-
Electrification compatibility. As hybrid and electric excavators enter the market, breaker manufacturers are adapting designs to work with variable-speed hydraulic pumps and energy storage systems. Matching the breaker's operating profile to the carrier's power management is a new engineering challenge.
-
Environmental regulations. Stricter noise, dust, and vibration limits in urban areas continue to push the industry toward silent designs, certified sound power levels, and proactive compliance documentation. Early "silent" breaker development began in the 1980s, and the trend has only accelerated.
Checklist for Buying a New or Used Hydraulic Hammer
Whether you are interested in a new or used unit, a systematic inspection prevents costly surprises. Use this list before signing any purchase order or sales agreement.
Sizing and compatibility:
-
Confirm the breaker's weight class matches your carrier's operating weight range.
-
Verify hydraulic flow and pressure requirements against your machine's auxiliary circuit specs.
-
Check that the mounting bracket fits your carrier's pin spacing or quick coupler.
Physical condition (especially used units):
-
Inspect the housing for cracks, especially around tie rod holes and mounting points.
-
Measure tool and bushing wear. If the tool wobbles visibly in the bushing, both need replacement.
-
Check tie rods for stretch marks, corrosion, or thread damage.
-
Look for hydraulic leaks around seals, hose fittings, and the backhead.
Nitrogen and accumulator:
-
Test nitrogen pre-charge pressure with a gauge. Low or zero pressure indicates a failed bladder/diaphragm or a slow leak.
-
Ask for service records on accumulator maintenance.
Service history and support:
-
Request a maintenance log. Well-documented service history signals a responsibly maintained unit.
-
Confirm availability of spare parts, seal kits, tools, and accessories like a nitrogen charging kit and extra chisel sets.
-
Check service support options: dealer network, turnaround time for repairs, and availability of field service technicians in your area.
Warranty and commercial terms:
-
Evaluate warranty coverage on new units: duration, what is covered, what voids coverage.
-
For used units, ask if any remaining manufacturer warranty transfers with the sale.
-
Factor in expected rebuild intervals and parts cost when comparing the price of competing models.
A thorough pre-purchase inspection takes an hour. Skipping it can cost you a season of downtime and repair bills.
Conclusion and Practical Takeaways
Hydraulic hammers remain one of the most versatile and productive attachments available for excavators, backhoe loaders, and steer loaders. From breaking concrete on a residential foundation to splitting boulders in a quarry, the right breaker matched to the right carrier and operated correctly will deliver years of reliable service.
Top actionable tips:
-
Match the breaker to your excavator's weight, flow, and pressure specs before anything else. An oversized or undersized hammer creates problems that no amount of maintenance can fix.
-
Monitor nitrogen pre-charge at regular intervals. Low nitrogen is the most common and most preventable cause of reduced performance and internal damage.
-
Grease the tool and bushing on schedule, every time. Auto-lube systems pay for themselves quickly on high-duty machines.
-
Train operators to avoid prying, dry firing, and extended hammering in one spot. These three habits cause the majority of premature failures.
-
Keep a maintenance log and follow manufacturer service intervals. A hammer with documented history holds its value and avoids surprise breakdowns.
Hydraulic breaker technology continues to advance with quieter designs, smarter monitoring, and more durable materials. By applying the best practices outlined in this guide today, you protect your equipment investment, improve on-site productivity, and set your operation up for long-term success.