
Table of Contents
- Why Use Ironmartonline Equipment Broker
- Preparing Machinery for Sale Photos: Clean, Inspect, Stage
- Essential Angles for Construction Machinery Listings
- Camera Settings and Lighting for How to Photograph Heavy Equipment
- Using Video to Sell Heavy Equipment
- How Many Photos Does Your Listing Need?
- Post-Processing and Editing Basics for Equipment Photos
- Common Mistakes When You Photograph Heavy Equipment
- Conclusion
- Frequently Asked Questions
Last Updated: September 12, 2026
Why Use Ironmartonline Equipment Broker
If you're asking why use Ironmartonline equipment broker, the short answer is reach: your listing gets pushed across nine specialized web-based selling platforms instead of sitting on one site waiting for a buyer to stumble onto it. That's the core difference between a machine that sells in weeks and one that sits on a lot for a season. Maximizing exposure remains the most effective strategy for selling machinery online, a principle that holds equally true for those navigating the complexities of selling modified project cars.
Learning how to photograph heavy equipment for listing is the other half of that equation. Ironmartonline is a heavy equipment brokerage built to connect sellers with buyers locally and globally, and the photos you upload are what those buyers judge first. According to Concrete Iron's equipment listing guide, machines valued over $5,000 need at least 12-20 photos, while equipment under $5,000 needs 8-12. Get that wrong and even a strong platform can't rescue the listing.
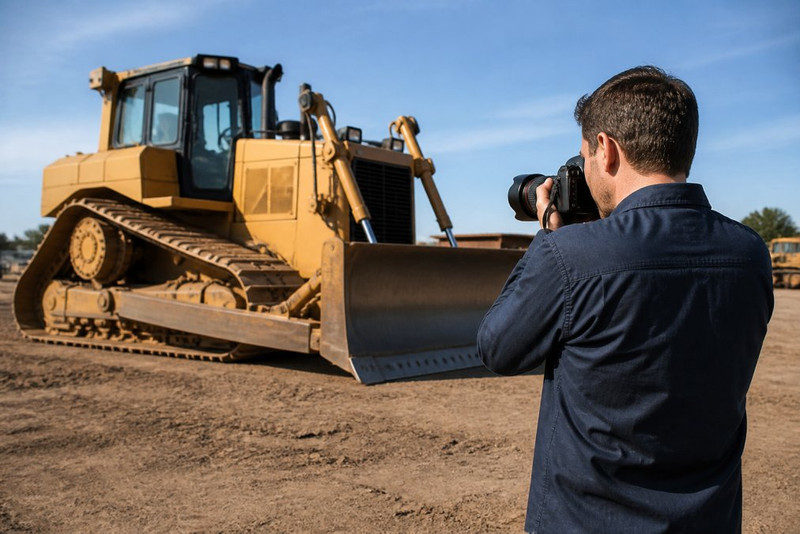
Below, we'll walk through staging, angles, camera settings, video, and editing so your excavator, dozer, or truck presents like it was prepped by a professional. The difference between a fast sale and a stale listing usually comes down to about an hour of shooting.
Preparing Machinery for Sale Photos: Clean, Inspect, Stage
Preparing machinery for sale photos starts with washing the machine before you ever pick up a camera. Grease on a boom cylinder reads as neglect in a photo, and buyers notice it immediately.
Start with a pressure wash, then work through these steps:
- Clear dirt from the undercarriage, tires and tracks, and hydraulic fittings
- Wipe down the cab interior, glass, and controls
- Check for fluid streaks under the machine and address them
- Park on clean gravel or pavement, away from buildings and tree lines
- Shoot in the morning or late afternoon when light is soft and even
According to Equipment Trader's photography guidance, proper environmental staging, such as avoiding shadows from buildings or trees, significantly improves the clarity and professional appearance of a machinery listing. Background clutter is the fastest way to make a $90,000 machine look like scrap.
Essential Angles for Construction Machinery Listings
The essential angles for construction machinery listings cover eight positions: front three-quarter, rear three-quarter, both sides, front, rear, top of the cab, and the working end of the machine. Shoot all of them horizontally.
Horizontal orientation is the standard requirement for equipment listings, and a 4:3 aspect ratio is the preferred size, according to Conquest Equipment's listing standards. Vertical phone photos get cropped awkwardly on most marketplaces and make the machine look smaller than it is.

Walk the machine in a full circle and shoot from a consistent height, roughly chest level. Drop low for the undercarriage and tracks, then climb up for a cab interior shot that shows the seat, controls, and dash.
- Exterior inspection: four corners plus both full sides
- Undercarriage: tracks, rollers, sprockets, and any visible wear
- Cab interior: seat condition, joysticks, gauges, and hour meter
- Working components: bucket teeth, boom, stick, and hydraulics
Camera Settings and Lighting for How to Photograph Heavy Equipment
You don't need a professional camera to learn how to photograph heavy equipment well. Modern smartphones handle this job if you control the light and hold the phone steady. But controlling light on a 30-ton excavator is different from shooting a product on a table. Here's how to handle the specific challenges.
Natural daylight is the primary standard across the industry, and multiple sources, including Mico Equipment's photography notes, emphasize it for accurate condition representation. Shoot on an overcast day or in open shade. Direct midday sun blows out highlights on yellow paint and hides rust in harsh shadow.
Camera Settings That Work for Machinery
If you're using a dedicated camera, start with these settings and adjust as needed:
- Aperture: f/8 to f/11. This keeps the entire machine sharp from bucket to counterweight. Wider apertures (f/2.8, f/4) blur the background but also soften the far end of the machine.
- Shutter speed: 1/125 or faster for handheld shots. If you're bracing against a truck bed or using a tripod, you can drop to 1/60 for better depth of field in low light.
- ISO: Keep it as low as possible, 100 to 400. Higher ISO introduces noise that makes rust and wear look worse than it is.
- White balance: Set it manually to daylight (5500K) or use a gray card. Auto white balance often turns yellow paint orange or green, which misrepresents the machine.
- Focus: Use single-point autofocus and place the point on the machine, not the background. For close-ups of hydraulics or undercarriage, switch to manual focus if your camera hunts.
On a smartphone, tap to focus on the machine, then swipe down to lower exposure slightly if the sky is bright. Most phone cameras default to a wide-angle lens that distorts proportions, step back and use the 2x telephoto if available to avoid making the machine look stretched.
Lighting Challenges and How to Solve Them
Heavy equipment has reflective surfaces, deep recesses, and large flat panels that create specific lighting problems:
- Glare on glass and chrome: Shoot from an angle, not straight on. If the cab glass reflects the sky, move to the side or wait for a cloud. Polarizing filters help on dedicated cameras but can't be replicated on most phones.
- Shadows under the boom and inside the cab: These hide damage. Use a reflector (a white foam board works) to bounce light into dark areas, or shoot when the sun is at a 45-degree angle to the machine so shadows fall away from critical components.
- Yellow paint blowing out: Yellow is highly reflective. Underexpose by 1/3 to 1/2 stop to retain detail in the paint. You can brighten shadows in editing later.
- Mixed lighting: If you shoot half the machine in shade and half in sun, the color temperature will be inconsistent. Move the machine to a fully shaded area or wait for uniform cloud cover.
A Note on Safety and Legal Considerations
Photographing heavy equipment isn't just about settings, it's also about safety and accuracy. Never climb on a machine without proper fall protection, and never operate equipment you're not trained to run just to get a video. If you're photographing a machine on a job site, wear high-visibility clothing and stay clear of active operations.
Legally, your photos must accurately represent the machine. Misrepresenting condition, whether by hiding damage or using editing tricks to make worn parts look new, can expose you to claims of misrepresentation. Most marketplaces require you to disclose known defects, and a clear close-up of wear with a one-line description protects both you and the buyer.
Equipment-Specific Checklist
Different machines need different shots. Use this as a starting point:
- Excavators: boom, stick, bucket teeth, hydraulic cylinders, undercarriage (tracks, rollers, sprockets), cab interior, hour meter, any leaks.
- Dozers: blade, cutting edge, ripper, tracks, undercarriage, engine compartment, cab, hour meter.
- Wheel loaders: bucket, cutting edge, tires (tread depth and sidewall condition), articulation joint, hydraulic cylinders, cab, hour meter.
- Dump trucks: bed (floor and sides), tailgate, tires, suspension, engine, cab, odometer, any rust or cracks.
For each, shoot wide shots to show overall condition and close-ups to document wear. A downloadable checklist you can print and carry to the shoot ensures you don't miss anything.
Using Video to Sell Heavy Equipment
Using video to sell heavy equipment is now expected, not optional. Industry guides, including Aaron Equipment's used machinery resources, recommend 360-degree views so buyers can assess condition without a site visit.
A two-to-three-minute walkaround works for most listings. Start wide, then move in:
- Cold start, filmed from outside the cab so buyers hear the engine
- Full walkaround at chest height
- Operation of the primary function, such as boom, bucket, or blade
- Close-ups of the undercarriage, hydraulics, and any wear
- Shutdown and a final wide shot
Keep the phone horizontal, move slowly, and narrate what you're showing. Buyers who watch a video arrive at the conversation already qualified, which cuts the back-and-forth before a sale.
How Many Photos Does Your Listing Need?
Photo count scales with machine value. High-value equipment needs more coverage because buyers expect to inspect condition in detail before traveling to see it.
| Equipment Value | Minimum Photos | Recommended Coverage |
|---|---|---|
| Under $5,000 | 8-12 | Exterior, cab, working components |
| $5,000-$25,000 | 12-20 | Above plus undercarriage and hour meter |
| Over $25,000 | 20+ | Above plus video walkaround and detail shots |
That threshold comes straight from Concrete Iron's listing volume recommendations, which sets 12-20 photos as the minimum for equipment over $5,000. More photos don't hurt, but weak photos do. Twenty blurry shots perform worse than twelve sharp ones.
Post-Processing and Editing Basics for Equipment Photos
Editing should correct, not decorate. Adjust exposure, straighten the horizon, and crop to a clean 4:3 frame. But for equipment listings, editing also carries a trust burden: buyers scrutinize photos for signs of hidden damage, and heavy-handed edits can backfire.
Most phone photo apps and free desktop tools handle this. What you're fixing:
- Exposure: brighten underexposed shots slightly, never blow out the highlights. If the sky is white and the machine is dark, use a graduated filter or adjust shadows selectively.
- White balance: neutralize the color cast so yellow paint reads as yellow. Use the eyedropper tool on a neutral gray area (like concrete) if your app has one.
- Crop: remove background clutter and center the machine. Stick to 4:3 or 3:2, vertical crops break marketplace layouts.
- Sharpening: apply lightly, and only if the original is genuinely sharp. Over-sharpening creates halos around edges that look artificial.
- Straightening: use the horizon line (or the machine's tracks) to level the image. A tilted photo makes the machine look unstable.
Skip filters entirely. Saturated, contrast-boosted photos make buyers suspicious that you're hiding rust or damage, and that suspicion kills conversion rate faster than a dull photo ever would.
Mobile App Recommendations for Quick Edits
If you're shooting and listing from a phone, these apps streamline the process:
- Snapseed (free, iOS/Android): Selective adjustment tool lets you brighten shadows under the boom without affecting the whole image. Healing brush removes small distractions.
- Adobe Lightroom Mobile (free with optional premium): Excellent for batch editing multiple photos with consistent settings. The color grading tools help correct white balance accurately.
- Google Photos (free): Basic but fast. Auto-enhance works for well-lit shots, but avoid the "pop" filter, it over-saturates.
- Photo Editor by Aviary (free): Simple crop, straighten, and exposure tools with a clean interface.
For file management, use your phone's native gallery to tag and organize photos by machine. Rename files with the machine's make, model, and view (e.g., "CAT320_front.jpg") before uploading, this helps you keep track and makes it easier for buyers to reference specific images.
Legal and Ethical Editing Boundaries
Editing for clarity is fine. Editing to deceive is not. The line:
- Allowed: Adjusting exposure, white balance, cropping, straightening, and minor sharpening to make the photo look like what you saw.
- Not allowed: Cloning out damage, using filters that hide rust, or stitching together different machines. Most marketplaces have policies against misrepresentation, and buyers who arrive to inspect a machine that doesn't match the photos will walk, and may leave negative feedback.
If you're unsure, err on the side of showing more. A close-up of a worn hydraulic hose with a note "minor seepage, replacement recommended" builds more trust than a photo that conveniently avoids the area.
Common Mistakes When You Photograph Heavy Equipment
The most expensive mistakes are the ones that hide condition. Buyers read obscured damage as deception, and they walk.
Watch for these:
- Shooting vertically: breaks the standard layout on most marketplaces
- Ignoring wear and tear: skipping the undercarriage or a bent step looks like you're hiding something
- Cluttered backgrounds: trailers, debris, and other machines pull attention off the listing
- Inconsistent lighting: mixing shade and sun across one listing makes the machine look like two different units
- No close-ups: skipping hydraulics, tires and tracks, and machine components leaves buyers guessing
Documenting wear and tear openly, with a close-up and a one-line description, builds more trust than a set of photos that conveniently avoids the problem areas. Buyers expect honest listings, and they reward them with faster offers.
Conclusion
Photographing equipment well takes an afternoon, not a production crew. Clean the machine, shoot horizontally in natural light, cover every angle, add a walkaround video, and edit only enough to correct the image. That's the whole job.
Ironmartonline puts those photos in front of millions of potential buyers across nine specialized selling platforms, with no contracts and no hidden fees. If you'd rather hand the listing side to a brokerage, our heavy equipment broker service handles the reach while you handle the shoot. Join our email list to see how sellers move surplus excavators, dozers, and trucks faster with a professional marketplace behind them.
Frequently Asked Questions
What are the best angles for photographing excavators and loaders?
Start with a front three-quarter shot at eye level, then capture both sides, the rear, and the cab interior. Get close-ups of the undercarriage, hydraulics, bucket teeth, and any wear. Finish with a top-down or elevated shot if safe. Horizontal orientation and a 4:3 aspect ratio are standard for most marketplaces, and natural daylight prevents shadows that hide damage.
Do I need a professional camera to photograph heavy equipment for a listing?
A modern smartphone works well if you focus on lighting, horizontal orientation, and clean framing. Industry guides note that smartphones are sufficient when the photographer prioritizes natural daylight and steady shots. A tripod helps with low-light conditions or video walkthroughs, but the biggest gains come from preparation and angles, not camera price.
How many photos should I include in a heavy equipment listing?
For equipment valued over $5,000, include 12-20 photos. For equipment under $5,000, 8-12 photos is the recommended minimum. Cover the exterior from all sides, the cab interior, engine compartment, undercarriage, tires or tracks, and any wear or damage. More high-quality photos build buyer trust and reduce back-and-forth questions.
Should I clean heavy equipment before taking listing photos?
Yes. Pressure-wash the undercarriage, wipe down the cab, and clear debris from the bucket or bed. Clean equipment photographs better and signals that you maintained the machine. Avoid hiding damage, though. Buyers value honesty, and clear close-ups of wear and tear prevent disputes later. Stage the machine on gravel or pavement, away from background clutter.