
Table of Contents
- Why Use an Equipment Broker for Transport Coordination
- Preparing Your Equipment for Heavy Equipment Transport
- Understanding Oversized Load Permit Requirements
- Selecting the Right Trailer Type for Your Machinery
- How to Secure Heavy Equipment for Transport
- Heavy Equipment Transport Insurance Coverage
- Loading, Unloading, and Route Planning Best Practices
- Post-Delivery Inspection and Documentation
- Frequently Asked Questions
Last Updated: September 24, 2026
Why Use an Equipment Broker for Transport Coordination
Moving heavy machinery is expensive and risky. One wrong move costs thousands in damage, delays, or regulatory fines. Most sellers handle transport alone and struggle with permits, trailer selection, and logistics coordination. Why use an equipment broker to transport heavy equipment and manage coordination? Because a Heavy Equipment Broker like Ironmartonline manages the entire process, from route planning to final delivery, while you focus on closing the sale.
When you sell heavy equipment, the buyer expects it delivered safely and on time. That's where transport coordination becomes critical. According to WhyLoyalty's heavy equipment transport guide, shipments exceeding 80,000 lbs require specialized permits and trailer configurations that complicate standard transport timelines. Missing these details costs money and credibility.
An equipment broker handles the logistics so you don't have to. Ironmartonline coordinates with carriers, manages documentation, and ensures compliance with federal and state regulations. This eliminates guesswork and protects your reputation as a seller.
The real advantage? Speed and cost control. Industry logistics experts recommend a 7-10 day lead time to avoid expedited shipping fees, but coordinating this yourself means juggling multiple vendors and timelines. A broker consolidates these decisions into a single point of contact. You get predictable costs, faster turnaround, and one less headache during the sale.
Below, we'll show you exactly how to transport heavy equipment after sale, from preparing your machinery to securing it for transit and handling post-delivery inspection.
Preparing Your Equipment for Heavy Equipment Transport
Before your equipment moves, it needs preparation. Damage during transit often stems from poor setup, not carrier error.
Start with a full inspection. Document the equipment's current condition with photos and notes. Check fluid levels, battery charge, and tire pressure. Secure or remove any loose parts, mirrors, antennas, or attachments. These items shift during transit and cause damage.
Drain hazardous fluids if required by law or carrier policy. Fuel tanks should be near empty to reduce weight and fire risk. Some carriers require this; others don't. Check with your carrier first.
Clean the equipment. Buyers expect to see what they're getting. Dirt and grease hide damage and make inspection harder after delivery.
Key preparation steps:
- Document condition with dated photos
- Check all fluid levels and top off as needed
- Secure or remove loose attachments
- Drain fuel to safe levels per carrier rules
- Clean exterior surfaces
Proper preparation reduces transit damage claims and keeps your sale on track.
Understanding Oversized Load Permit Requirements
Heavy equipment often qualifies as an oversized load. This triggers permit requirements that vary by state and weight, and understanding the cost and timeline mechanics is critical to budgeting transport accurately.
What makes a load oversized?
- Width exceeding 8 feet 6 inches
- Height exceeding 13 feet 6 inches
- Length exceeding 60 feet
- Gross vehicle weight exceeding 80,000 lbs
How permit costs are calculated:
Permit fees are not flat rates, they stack based on multiple variables. Most states charge a base permit fee ($50-$300) plus per-mile fees that scale with equipment weight. A 90,000-lb excavator crossing three states might incur $200 base + $0.10 per mile × 800 miles = $280 in mileage-based fees alone. Some states (like California and Texas) charge by weight tier; others use distance-based sliding scales. A few states bundle permits into a single regional fee. This fragmentation is why WhyLoyalty recommends maintaining a 10-15% cost buffer for variable expenses like permits and specialized trailers, permit costs are often the second-largest transport variable after carrier fees.
Timeline impact on shipping costs:
Permit processing times range from 3 to 14 days depending on state workload and whether you request expedited processing. Standard processing typically takes 7-10 days. Expedited permits (available in most states) cost 50-100% more and compress timelines to 1-3 days. If your carrier is ready to depart but permits aren't approved, you face two choices: pay expedited fees or delay the shipment and risk carrier availability, which may force you to book a more expensive alternative carrier.
Route complexity also affects permit lead time. Equipment requiring escort vehicles or pilot cars (common for loads exceeding 12 feet wide or 14 feet tall) requires additional coordination and can add 5-7 days to approval. Some routes demand time-of-day restrictions (no travel 6 a.m.-9 a.m. or 4 p.m.-7 p.m. in urban areas), which limits carrier scheduling flexibility and may require a second carrier if your original choice cannot accommodate the restriction.
State-specific permit variations:
Federal Motor Carrier Safety Administration (FMCSA) sets baseline standards, but states enforce dramatically different rules. Some states require advance notification to local law enforcement; others demand proof of insurance before issuance. A few states (notably those in the Northeast) require separate permits for each county a load crosses, multiplying both cost and processing time. Western states typically consolidate into regional permits, reducing friction. Coastal states often have port-specific requirements if equipment is destined for or originating from a shipping terminal.
Permit considerations:
- Processing time varies by state (3-14 days standard; 1-3 days expedited)
- Base fees range $50-$300; mileage fees add $0.05-$0.15 per mile depending on weight
- Expedited processing costs 50-100% premium over standard rates
- Escort or pilot car requirements add 5-7 days and $500-$2,000 per day in escort fees
- Some states charge per-county; others use regional permits
- Time-of-day restrictions may force carrier rescheduling or carrier substitution
Plan ahead to avoid cost escalation. A 7-10 day lead time allows standard permit processing and avoids expedited premiums. If your sale timeline is compressed, budget for expedited permits as a line item. A Heavy Equipment Broker manages permit research, filing, and state-specific compliance, eliminating the guesswork and ensuring your shipment stays compliant while keeping costs predictable.
Selecting the Right Trailer Type for Your Machinery
Trailer selection determines whether your equipment arrives safely. Wrong trailer choice causes shifting, damage, and failed delivery.
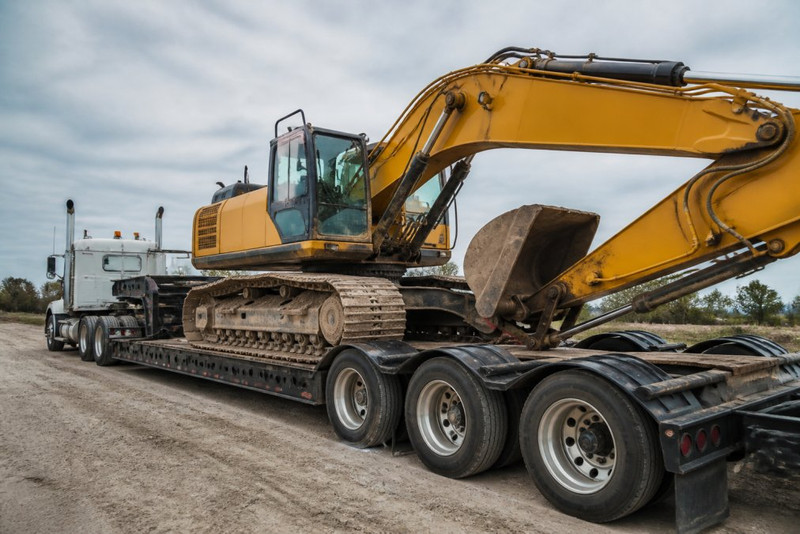
Lowboy trailers work best for heavy, low-profile equipment like dozers and excavators. They have a low deck height, which keeps the center of gravity stable and reduces clearance issues. Weight capacity ranges from 40,000 to 80,000 lbs depending on axle configuration.
Flatbed trailers suit equipment with standard dimensions, tractors, loaders, and smaller machinery. They're versatile and cost less than specialized trailers. Standard flatbeds handle loads up to 45,000 lbs.
Specialized trailers (gooseneck, drop-deck, or heavy-haul) accommodate oversized or oddly shaped equipment. These cost more but prevent damage that would exceed the trailer rental fee.
Trailer type depends on equipment weight, dimensions, and destination. A 26-ton excavator needs a lowboy; a mid-size tractor fits a flatbed.
Trailer selection criteria:
- Equipment weight and axle load limits
- Equipment height and width dimensions
- Destination terrain and road conditions
- Budget constraints
- Clearance requirements along route
Work with your broker to match equipment to trailer. Ironmartonline evaluates your machinery and recommends the right configuration, eliminating costly mistakes.
How to Secure Heavy Equipment for Transport
Proper securement prevents shifting and damage during transit. Loose equipment is the leading cause of transport failures.
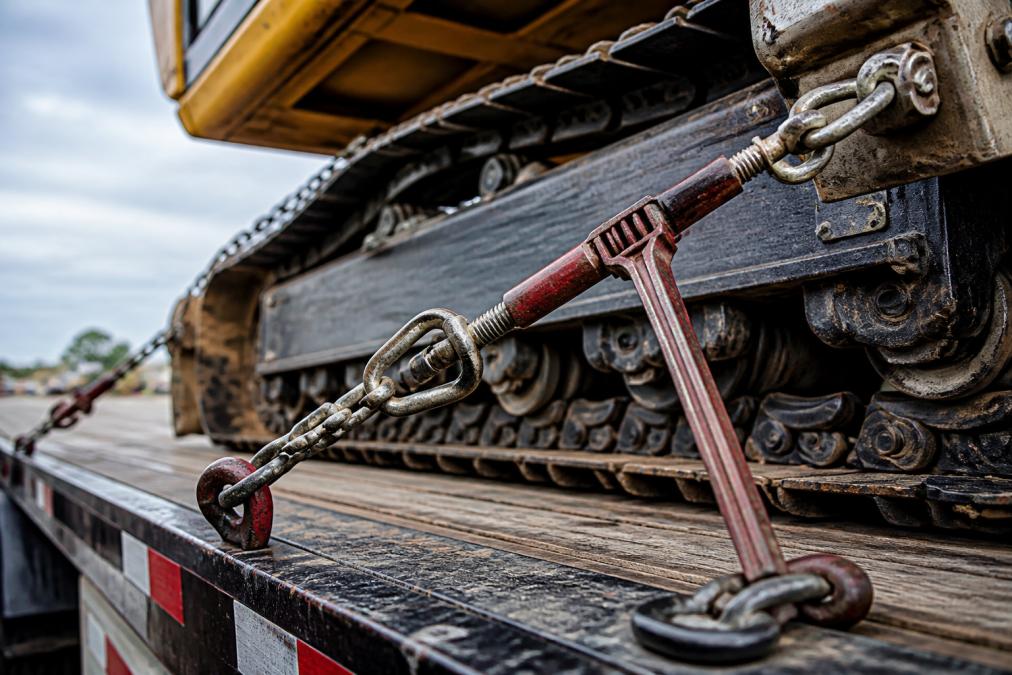
Load securement basics:
Use chain binders, straps, or cable to anchor equipment to trailer anchor points. Federal regulations require minimum securement based on weight. Equipment over 5,000 lbs needs at least two independent tie-down points.
Chain tensioning is critical. Chains must be tight enough that equipment can't shift but not so tight they damage the machinery. Proper tension prevents slack during acceleration and braking.
Blocking and bracing fill gaps between equipment and trailer. This prevents rocking and lateral movement. Use wood blocks, airbags, or custom blocking designed for your equipment type.
Inspect securement before departure. Chains loosen during transit. Carriers conduct pre-trip and post-trip checks, but verify before handing off to the driver.
Securement checklist:
- Minimum two anchor points per equipment
- Chains rated for equipment weight
- Proper tension on all tie-downs
- Blocking fills gaps and prevents rocking
- No sharp edges contact chains or straps
- Securement rated for 0.8G lateral force
Poor securement voids insurance and creates liability. Take time to do it right.
Heavy Equipment Transport Insurance Coverage
Transport insurance protects your equipment from loss or damage during transit. Most carriers carry liability insurance, but that covers third-party injury claims, not your equipment.
Cargo insurance covers your machinery from point A to point B. Coverage includes collision, theft, and weather damage. Premiums vary by equipment value, distance, and carrier reputation.
Ask your carrier about included coverage limits. Standard policies cover $50,000 to $100,000. High-value equipment needs additional endorsements.
What cargo insurance covers:
- Transit damage from accidents or weather
- Theft or vandalism
- Equipment loss due to carrier negligence
- Some exclusions: improper securement, mechanical failure, pre-existing damage
What it doesn't cover:
- Damage from inadequate securement
- Mechanical breakdown during transport
- Damage visible before transit (your responsibility to document)
- Loss due to buyer's refusal to accept
Document equipment condition before handoff. Take photos of the loaded trailer. This protects you if damage claims arise.
Insurance costs 1-3% of equipment value for standard cross-country transport. It's cheap protection against a major loss.
Loading, Unloading, and Route Planning Best Practices
Successful transport starts with smart loading and ends with safe unloading.
Loading procedures:
Use ramps rated for equipment weight. Hydraulic ramps prevent equipment from rolling backward. Drive slowly and steadily onto the trailer. Sudden movements cause shifting and damage.
Position equipment for weight distribution. Heavy items go toward the trailer's center and front. This prevents tail-heavy imbalance that strains the tractor.
Route planning:
Survey the route before departure. Identify low clearances, weight-restricted bridges, and tight turns. GPS routing for heavy equipment differs from standard navigation. Use carrier-approved routing that accounts for oversized load restrictions.
Unloading:
Inspect equipment before unloading. Document any damage with photos and notes. Unload slowly using rated ramps. Avoid sudden drops or angles that stress equipment.
A loading dock with proper equipment makes unloading safer and faster. Coordinate with the buyer's facility to ensure they have adequate space and equipment.
Loading and unloading best practices:
- Use rated ramps for equipment weight
- Distribute weight for trailer balance
- Plan routes avoiding low clearances and weight restrictions
- Inspect equipment before unloading
- Document condition with photos
- Coordinate with buyer's receiving facility
Poor loading and unloading cause most transport damage. Invest time in these steps.
Post-Delivery Inspection and Documentation
After delivery, a thorough inspection protects both you and the buyer by creating a documented record of equipment condition and establishing clear accountability for any damage that occurred during transit.
Post-delivery inspection checklist:
Before the buyer accepts the equipment, conduct a systematic inspection using this standardized checklist. Compare findings against pre-transport photos taken during loading.
Structural and exterior:
- Check all painted surfaces for new dents, scratches, or paint chips
- Inspect welds, frames, and structural components for cracks or bending
- Verify all doors, hatches, and access panels open and close smoothly
- Look for fluid leaks under the equipment and on the trailer bed
- Confirm all decals, badges, and manufacturer plates are intact
- Check tires (if applicable) for new cuts, bulges, or pressure loss
Mechanical and operational:
- Start the engine and listen for abnormal noises (grinding, knocking, squealing)
- Test all hydraulic systems for smooth operation and leaks
- Verify all gauges, lights, and warning indicators function
- Check battery voltage and connections for corrosion or looseness
- Operate all moving parts (boom, bucket, blade, etc.) through full range of motion
- Confirm all fluid levels match pre-transport documentation
Attachment and component verification:
- Count and verify all loose items listed on the Bill of Lading (keys, manuals, spare parts)
- Confirm all bolts, fasteners, and securing chains are present and tight
- Check that no components shifted or separated during transit
- Verify serial numbers on major components match the sales documentation
Documentation during inspection:
Take dated, timestamped photos of any discrepancies. Photograph damage from multiple angles and include a reference object (ruler, coin) to show scale. Note the specific location on the equipment (e.g., "right side of cab, 18 inches above ground"). If damage is significant, video record the inspection with narration describing each finding.
Bill of Lading and damage notation:
A Bill of Lading is the legal document proving equipment was delivered and its condition at receipt. The carrier's driver will present this document for signature. Do not sign a clean Bill of Lading if damage is visible. Instead, note all damage in the "Condition Upon Delivery" section before signing. Write "Received with damage to [specific location and description]" and have the driver initial the notation. This creates a legal record that the carrier received the equipment in damaged condition, which is essential for insurance claims.
If the driver refuses to note damage or pressures you to sign without notation, photograph the damage, refuse to sign, and contact the carrier's claims department directly within 24 hours. Most carriers require damage claims to be filed within 48-72 hours of delivery, so speed is critical.
Maintenance and service records:
Provide the buyer with complete maintenance history, including:
- Service logs and dates of all maintenance performed
- Parts replaced and warranty information
- Telematics or hour-meter readings (if applicable)
- Operator manuals and parts lists
- Any recalls or known issues
Buyers trust equipment with documented care, and this documentation also protects you from post-sale disputes about pre-existing mechanical issues.
Post-delivery documentation package:
- Signed Bill of Lading with condition notes (if applicable)
- Inspection photos and video (dated and timestamped)
- Maintenance records and service logs
- Warranty information and transfer documentation
- Operator manuals and parts lists
- Permit copies and transportation compliance documentation
- Proof of insurance and cargo coverage
Dispute resolution and insurance claims:
If damage is discovered after the buyer accepts the equipment, the timeline for filing a claim depends on whether damage was visible at delivery. Visible damage must be noted on the Bill of Lading to be insurable. Hidden damage (e.g., internal mechanical failure discovered weeks later) is typically the buyer's responsibility unless you can prove it resulted from improper securement or carrier negligence documented during inspection.
Keep all inspection documentation for at least two years. If a dispute arises, your photos, video, and signed Bill of Lading are your primary evidence. Insurance carriers will request this documentation before processing any claim.
This documentation protects you from post-sale disputes and supports warranty claims if issues arise. It also establishes clear accountability: if damage occurred during transit and was properly documented, the carrier's insurance covers it. If damage was pre-existing or the buyer failed to note it at delivery, responsibility shifts to the buyer.
Frequently Asked Questions
What permits are required for transporting oversized heavy equipment?
Oversized load permits are required when machinery exceeds state-specific dimension or weight limits. Most states require permits for loads over 80,000 lbs gross vehicle weight or when width exceeds 8.5 feet. Contact your state's Department of Transportation at least 7-10 days before transport to secure permits and avoid expedited fees. Permit costs and routing restrictions vary by state and load specifications. An equipment broker can handle this coordination to ensure compliance with Federal Motor Carrier Safety Administration (FMCSA) regulations.
How do I prepare heavy machinery for long-distance transport?
Start by documenting the equipment's condition with photos and noting any existing damage. Drain fluids if required by carrier regulations, secure all loose parts, and retract any extendable components. Verify the machinery's dimensions and gross vehicle weight to determine trailer requirements. Schedule transport with a 7-10 day lead time to avoid rush fees. Ensure all hydraulic lines are properly capped and the equipment is clean to prevent transit damage. Request a bill of lading from your carrier documenting the condition at pickup.
What insurance coverage is necessary when shipping heavy equipment?
Heavy equipment transport insurance protects against damage, loss, or liability during transit. Most third-party carriers include basic cargo coverage, but verify coverage limits match your equipment's appraised value. Additional coverage may be needed for high-value machinery or international shipments. Request a Certificate of Insurance from your carrier before transport begins. Budget for variable expenses including insurance premiums and specialized trailer requirements.
How do I choose between a flatbed, step-deck, or RGN trailer for my equipment?
Flatbed trailers suit machinery with low ground clearance and standard dimensions. Step-deck (drop-deck) trailers lower the deck height, reducing overall load height for clearance-sensitive routes. RGN (removable gooseneck) trailers feature a detachable front section, allowing self-loading equipment or low-ground-clearance machinery to drive on independently. Choose based on your equipment's height, weight distribution, and loading capability. An equipment broker can assess your specific machinery dimensions and route requirements to recommend the optimal trailer configuration.
Transporting heavy equipment after sale is complex, but it doesn't have to be stressful. Ironmartonline handles the logistics, permits, and coordination so you can focus on closing deals. Our team manages everything from route planning to post-delivery inspection, ensuring your equipment arrives safely and on time. Connect with Ironmartonline today to simplify your next equipment sale.