
Last Updated: November 13, 2026
Quick Summary
Identifying hidden damage in used excavators means checking the undercarriage, hydraulic cylinders, frame welds, engine blow-by, and electrical codes before you buy. The expensive damage is almost never the obvious damage, so run a cold start test and pull a hydraulic fluid sample. Group findings into must-fix, should-fix, and monitor, then price them against the asking price.
- Bring a flashlight, mirror, magnet, paint thickness gauge, grease gun, and checklist to every inspection.
- A cylinder rod extending more than about an inch in ten minutes signals worn piston seals.
- A magnet will not stick to body filler, flagging patched and painted-over damage.
- Fresh paint on the undercarriage or greased fittings right before your visit may hide rust and seized rollers.
- Machines from wet coastal regions show more rust on pins, bushings, and roller seals.
Table of Contents
- Why a Used Excavator Inspection Checklist Saves You Thousands
- What to Bring and How to Prepare
- Digital Diagnostic Tool Integration
- Used Excavator Undercarriage Inspection: Where Money Goes to Die
- Used Excavator Hydraulic System Problems: Cylinder Drift, Cavitation, and Seal Integrity
- Frame Integrity and Stress Fractures: Reading the Structure
- Engine Blow-By, Cold Start Test, and Noise Analysis
- Electrical System and Error Code Diagnostics
- Repainting, Patch Welds, and Paint Overspray: Signs of Cover-Up
- Pivot Points, Bushings, and Swing Bearing Play
- Used Excavator Pre-Purchase Inspection: Repair Cost Estimation and Climate-Specific Wear
- Selling a Machine With Known Issues? Get It in Front of Serious Buyers
- Frequently Asked Questions
Why a Used Excavator Inspection Checklist Saves You Thousands
Identifying hidden damage in used excavators is the difference between a machine that earns its keep and one that drains your wallet. A used excavator is a steel-and-hydraulic assembly of wear points, and the damage that hurts most never shows up in a glossy listing photo. This guide walks through the key spots where hidden damage hides, in the order a careful buyer would check them.
So why use Ironmartonline as a heavy equipment broker? Ironmartonline connects buyers and sellers of used heavy equipment, and our marketplace is built around no contracts and no hidden fees.
Here is the hard truth most buyers learn too late: the expensive damage is almost never the obvious damage. A worn bucket edge is cheap. A cracked boom pivot is not.
Below, we'll show you exactly what to bring, where to look, and how to read what you find.
What to Bring and How to Prepare
Before you walk onto the lot, load a basic inspection kit. A flashlight, a small mirror, a magnet, a paint thickness gauge, a grease gun, and a clipboard with your checklist will cover most of the ground.
Preparation matters as much as the tools. Ask the seller for maintenance logs and operating hours in advance. A machine with clean service records and honest hour counts starts the inspection on better footing. A seller who dodges those requests is telling you something.
A common mistake is inspecting a cold machine. Always run a cold start test first, before the seller warms it up for you. Cold-start behavior reveals more than a warm engine ever will.
Digital Diagnostic Tool Integration
Modern excavators carry an electronic control unit that stores fault history. Plugging in a diagnostic scan tool lets you read stored error codes, even ones the seller cleared from the display.
This is one of the angles most buyers skip. A handheld scanner and the right software adapter can pull codes for the hydraulic system, engine, and electronics in minutes. If you do not own a scanner, ask the seller to run one and share the output.
- Check active and stored codes separately
- Note any codes cleared recently
- Compare code history to the maintenance logs
- Photograph the screen for your records
Watch out: a seller who refuses a diagnostic scan on a machine with an electronic control unit is hiding something.
Used Excavator Undercarriage Inspection: Where Money Goes to Die
The undercarriage is where most of your money goes, both at purchase and in repairs. Tracks, rollers, idlers, and sprockets wear together, and replacing a full undercarriage is one of the biggest single expenses on a used machine. A complete undercarriage replacement is one of the biggest single expenses on a used machine, which is why it is a key place a serious buyer looks.
Track chain and wear measurement. A used excavator undercarriage inspection starts with the track chain. Measure the chain pitch with a tape or a wear gauge: most manufacturers publish a percentage-of-wear limit, and a chain past that limit is due for replacement. Look for flat spots on the rollers, cracked links, and uneven wear patterns between the left and right sides. A machine that worked mostly in circles will show lopsided wear, and that pattern tells you more about the operator than the hour meter does.
Sprocket teeth. Check the drive sprocket teeth for sharp points and hooked profiles. A sprocket that has worn into a hook will accelerate chain wear even if the chain itself looks serviceable. Compare the tooth profile to the opposite side; uneven sprocket wear often points to a misaligned track frame or a bent idler.
Rollers and idlers. Spin each roller by hand and listen for grinding or roughness. A roller that will not turn freely or that leaks oil from its seal is a replacement item. Check the idler for play and for a worn tread surface. On many machines, rollers and idlers are the first undercarriage components to fail, and they are also the easiest to inspect without lifting the machine.
Track tension. Track tension should match the manufacturer's spec for the machine and the ground conditions. Too loose and the chain can jump the sprocket under load; too tight and you accelerate wear on the bushings and pins. Measure sag at the midpoint of the track run and compare it to the spec in the operator's manual. A machine that has been run with incorrect tension will show accelerated bushing wear and a stretched chain.
Climate-specific wear. Undercarriage wear is not uniform across regions. Machines from wet, coastal, or saltwater-influenced areas show more rust on pins, bushings, and roller seals, and salt corrosion can seize a roller that otherwise looks fine. Machines from dusty, hot regions show more abrasive wear on the chain and sprocket, and cooling system fins may be packed with dirt. Machines that worked in heavy mud or on soft ground often have packed material around the idlers and a stretched chain from high-torque operation. Match the machine's history to the wear you see; a coastal machine with clean, rust-free pins is either well-maintained or recently rebuilt, and you should ask which.
Cost context. Before you fall in love with a machine, price the undercarriage. A full set of tracks, rollers, idlers, and sprockets is a known line item, and a machine that needs all of it should be priced accordingly. Group your findings into must-fix, should-fix, and monitor categories, then compare that total against the asking price. A machine with 50 percent undercarriage life left is a different value than one at 10 percent, even at the same hour meter reading.
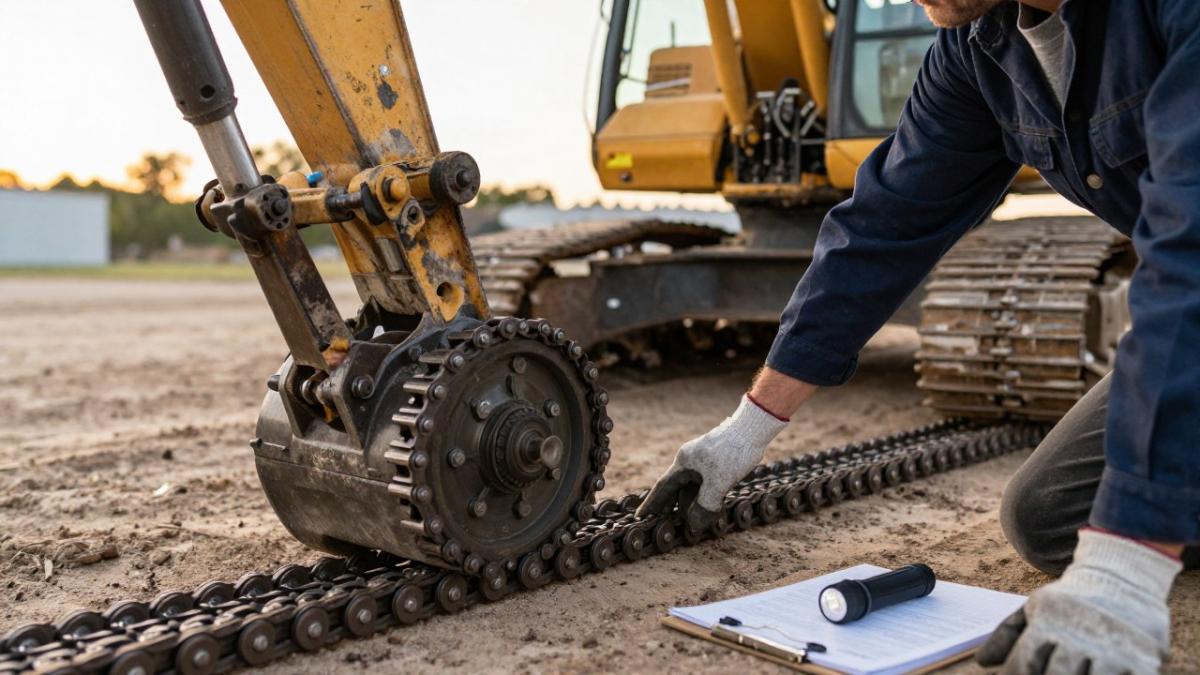
Watch out: a seller who has freshly painted the undercarriage or greased every fitting right before your visit may be hiding rust, seized rollers, or a chain that is past its wear limit.
If you want to see how a properly vetted machine's undercarriage is described, our Kobelco SK200LC-Mark IV excavator listing shows the details worth comparing against your own findings.
The undercarriage is where most of your money goes, so check each component against these wear signs.
| Component | What to check | Warning sign |
|---|---|---|
| Track chain | Measure chain pitch with tape or wear gauge | Past manufacturer's percentage-of-wear limit |
| Sprocket teeth | Look for sharp points and hooked profiles | Hooked sprocket accelerates chain wear |
| Rollers and idlers | Spin each roller by hand, listen for grinding | Will not turn freely or leaks oil from seal |
| Track tension | Measure sag at midpoint of track run | Too loose jumps sprocket; too tight wears bushings |
| Climate wear | Match machine history to wear seen | Coastal rust on pins; dusty regions abrasive chain wear |
Used Excavator Hydraulic System Problems: Cylinder Drift, Cavitation, and Seal Integrity
Hydraulic problems are the second-biggest money pit on a used excavator, and they are the hardest to spot because the damage happens inside cylinders, valves, and pumps. Cylinder drift, cavitation, and failing seals all point to internal wear that a visual walk-around will not catch. The good news is that a few structured tests can separate a machine with normal seepage from one that needs a major component rebuild.
Cylinder drift test. Raise the boom to full height, shut off the engine, and mark the cylinder rod with a piece of tape or a grease pencil. Wait ten minutes. A slow creep of a fraction of an inch is normal for many machines; a rod that extends more than about an inch in ten minutes points to worn piston seals or a leaking control valve. Repeat the test on the stick and bucket cylinders. Drift on multiple cylinders suggests a system-wide issue rather than a single bad seal.
Cavitation and aeration. Cavitation shows up as a whining or growling pump, foamy fluid in the reservoir, and sluggish response under load. Pull the dipstick or sight glass and look for milky, aerated fluid. A common cause is a clogged suction strainer or a loose inlet fitting pulling air. If the fluid looks like a milkshake, the machine has been running with air in the system, and pump wear is likely already underway.
Fluid analysis. Pull a sample from the reservoir mid-drain, not from the top, and send it to a lab for particle count and wear-metal spectroscopy. Lab reports that show iron and copper levels above the lab's stated averages can flag pump or valve wear. Dark, gritty fluid with visible metal flakes means internal wear is advanced. Keep the lab report with your inspection notes; it is your best negotiating document.
Seal integrity and leak points. Check the rod seals on every cylinder for weeping, and look for oil trails on the boom and stick. A dry cylinder that suddenly shows a fresh oil film after cycling is a seal on its way out. Inspect the swing motor and travel motor housings for oil residue, and check the hydraulic cooler for bent fins and seepage at the fittings.
Pressure and flow testing. If you can arrange it, have a technician tee in a pressure gauge at the main pump and test relief pressure at low idle and high idle. A pump that cannot reach spec under load is tired. Flow testing is the definitive check, but it requires a flow meter and the manufacturer's spec sheet. Ask the seller for the last hydraulic service records; a machine with a recent pump or valve rebuild should have documentation.
Watch out: a seller who will not allow a hydraulic fluid sample to be pulled, or who has freshly topped off the reservoir right before your visit, may be masking a known leak or contamination problem.
For a reference point on how hydraulic features and undercarriage condition get documented, our CAT 320ELRR crawler excavator listing shows the details a serious buyer should expect to see.
Frame Integrity and Stress Fractures: Reading the Structure
Frame integrity is where you find the damage that can total a machine. Stress fractures form at the boom and stick mounting points, the swing bearing area, and the frame welds.
Inspect every weld seam with a flashlight and mirror. Look for hairline cracks, rust bleeding from a seam, and fresh paint over a stress point. Structural fatigue often shows as tiny cracks radiating from bolt holes.
A magnet helps here. It will not stick to body filler, so it flags areas that were patched and painted over.
Engine Blow-By, Cold Start Test, and Noise Analysis
Engine blow-by tells you how much compression the rings are losing. Remove the oil fill cap with the engine running and feel for steady pressure or smoke pushing out. Heavy blow-by means worn rings or cylinder walls.
Run the cold start test before the seller warms the machine. Listen for hard cranking, excessive smoke, or a rough idle that smooths out once warm. Those are red flags.
Noise analysis rounds out the engine check. A knock, tick, or whine that changes with RPM points to a specific problem. Note where the sound comes from and how it changes under load.
Electrical System and Error Code Diagnostics
Electrical faults are the quiet killer of used equipment deals. A machine that starts fine on the lot can throw error codes the moment it works under load.
Start with the battery and charging system. Check terminal corrosion, cable condition, and alternator output. Then work through the lights, gauges, and safety shutoffs.
- Scan for stored error codes
- Test the safety shutoff and alarms
- Check every light and gauge
- Inspect wiring harnesses for rodent damage and chafing
Watch out: intermittent electrical faults are the hardest to diagnose and the most expensive to chase.
Repainting, Patch Welds, and Paint Overspray: Signs of Cover-Up
Fresh paint on a used excavator is not always good news. Paint overspray on hoses, glass, and decals usually means a quick cosmetic cover-up. Patch welds over a cracked frame are a serious red flag.
Run your hand along the frame and boom for lumps under the paint. A paint thickness gauge will confirm repainted panels. Check the original decals and serial plate for overspray edges.
For a look at how disclosed damage should be presented honestly in a listing, our fire-damaged Komatsu PC270LC-8 excavator listing shows the difference between transparency and a cover-up.
Pivot Points, Bushings, and Swing Bearing Play
Pivot points, bushings, and the swing bearing carry the machine's load and take constant abuse. Play here means sloppy operation and costly repairs.
Grab the bucket and try to rock it. Excessive movement at the pins and bushings signals wear. Then check the swing bearing for play by rocking the upper structure.
Grease condition at each fitting tells a story too. Dry, rusted fittings mean the machine was neglected.
Used Excavator Pre-Purchase Inspection: Repair Cost Estimation and Climate-Specific Wear
A used excavator pre-purchase inspection should end with a repair estimate, not just a list of problems. Group your findings into must-fix, should-fix, and monitor categories, then price each one against the asking price.
Climate-specific wear deserves its own line. Machines from wet regions show more rust and seal failure. Machines from dusty, hot regions show more undercarriage and cooling system wear. Match the machine's history to the wear you see.
Our John Deere 70D midi excavator listing shows what a well-maintained, one-owner machine looks like when you are ready to compare.
Selling a Machine With Known Issues? Get It in Front of Serious Buyers
Sometimes the inspection tells you to sell rather than buy. If you own a machine with known issues, disclosing them and reaching buyers who want a project machine is a sound approach.
Ironmartonline runs nine web-based selling platforms, with no contracts and no hidden fees, designed to put your equipment in front of potential buyers. If you are weighing your options, our guide to the best platforms for selling used dozers covers how to reach serious equipment buyers.
Hidden damage in used excavators rarely announces itself. It hides in a cracked frame weld, a drifting cylinder, or a track chain worn lopsided. The checklist above is how you find it before it finds your wallet.
At Ironmartonline, we connect buyers and sellers of used heavy equipment through nine selling platforms, with no contracts and no hidden fees. Whether you are inspecting a machine to buy or listing one to sell, our team can help you reach the right audience. Contact Ironmartonline to discuss listing your equipment.
Frequently Asked Questions
What should I inspect when buying a used excavator?
Start with the undercarriage: track tension, bushing wear, and sprocket teeth tell you how many hours the machine has truly worked. Then check hydraulic cylinders for drift and leaks, inspect the boom and stick for stress fractures or patch welds, run a cold start test to listen for engine blow-by, and pull error codes from the electronic control unit. Review maintenance logs and service records against the hour meter. A used excavator pre-purchase inspection that covers these areas catches most hidden damage before money changes hands.
How can I tell if a used excavator has hidden hydraulic damage?
Look for cylinder drift: raise the boom, shut off the engine, and watch whether the cylinder creeps down. Check for oil leaks at seals and fittings, and examine fluid color and contamination on the dipstick. Cavitation leaves pitting and noise in the pump, so listen for whining or knocking under load. Fresh paint around a cylinder or hose can hide a recent repair. If any of these signs appear, budget for a hydraulic pressure test before committing, because pump and cylinder repairs can run into five figures.
How do I check an excavator's undercarriage for excessive wear?
Measure track tension and compare wear patterns on both sides. Worn bushings, cupped sprocket teeth, and shiny pin surfaces indicate high operating hours. Check the idler and rollers for flat spots or leaks, and look for uneven wear that suggests misalignment or a bent frame. Undercarriage work is one of the largest repair costs on used excavators, so photograph each component and note the wear stage. If more than half the undercarriage is worn, factor replacement into your offer.
Should I hire a mechanic to inspect a used excavator before buying?
Yes, for any machine above scrap value. A qualified heavy equipment mechanic with diagnostic scan tools can read error codes, test hydraulic pressure, and measure structural wear in ways a visual walkaround cannot. Expect an independent inspection to take two to four hours on site. Pair the mechanic's report with service records and a fluid analysis. If the seller resists an inspection, treat that as a red flag and walk away, because honest sellers expect buyers to verify condition before purchase.
